Onboarding — Go-Live Setup
New wineries get live on Avero through the Go-Live Setup wizard at
/onboarding — the first thing you see after your account is created. It
walks you through everything needed to open the doors: your company, brand,
location, payments, tax, floor, team, and (optionally) your wine club.
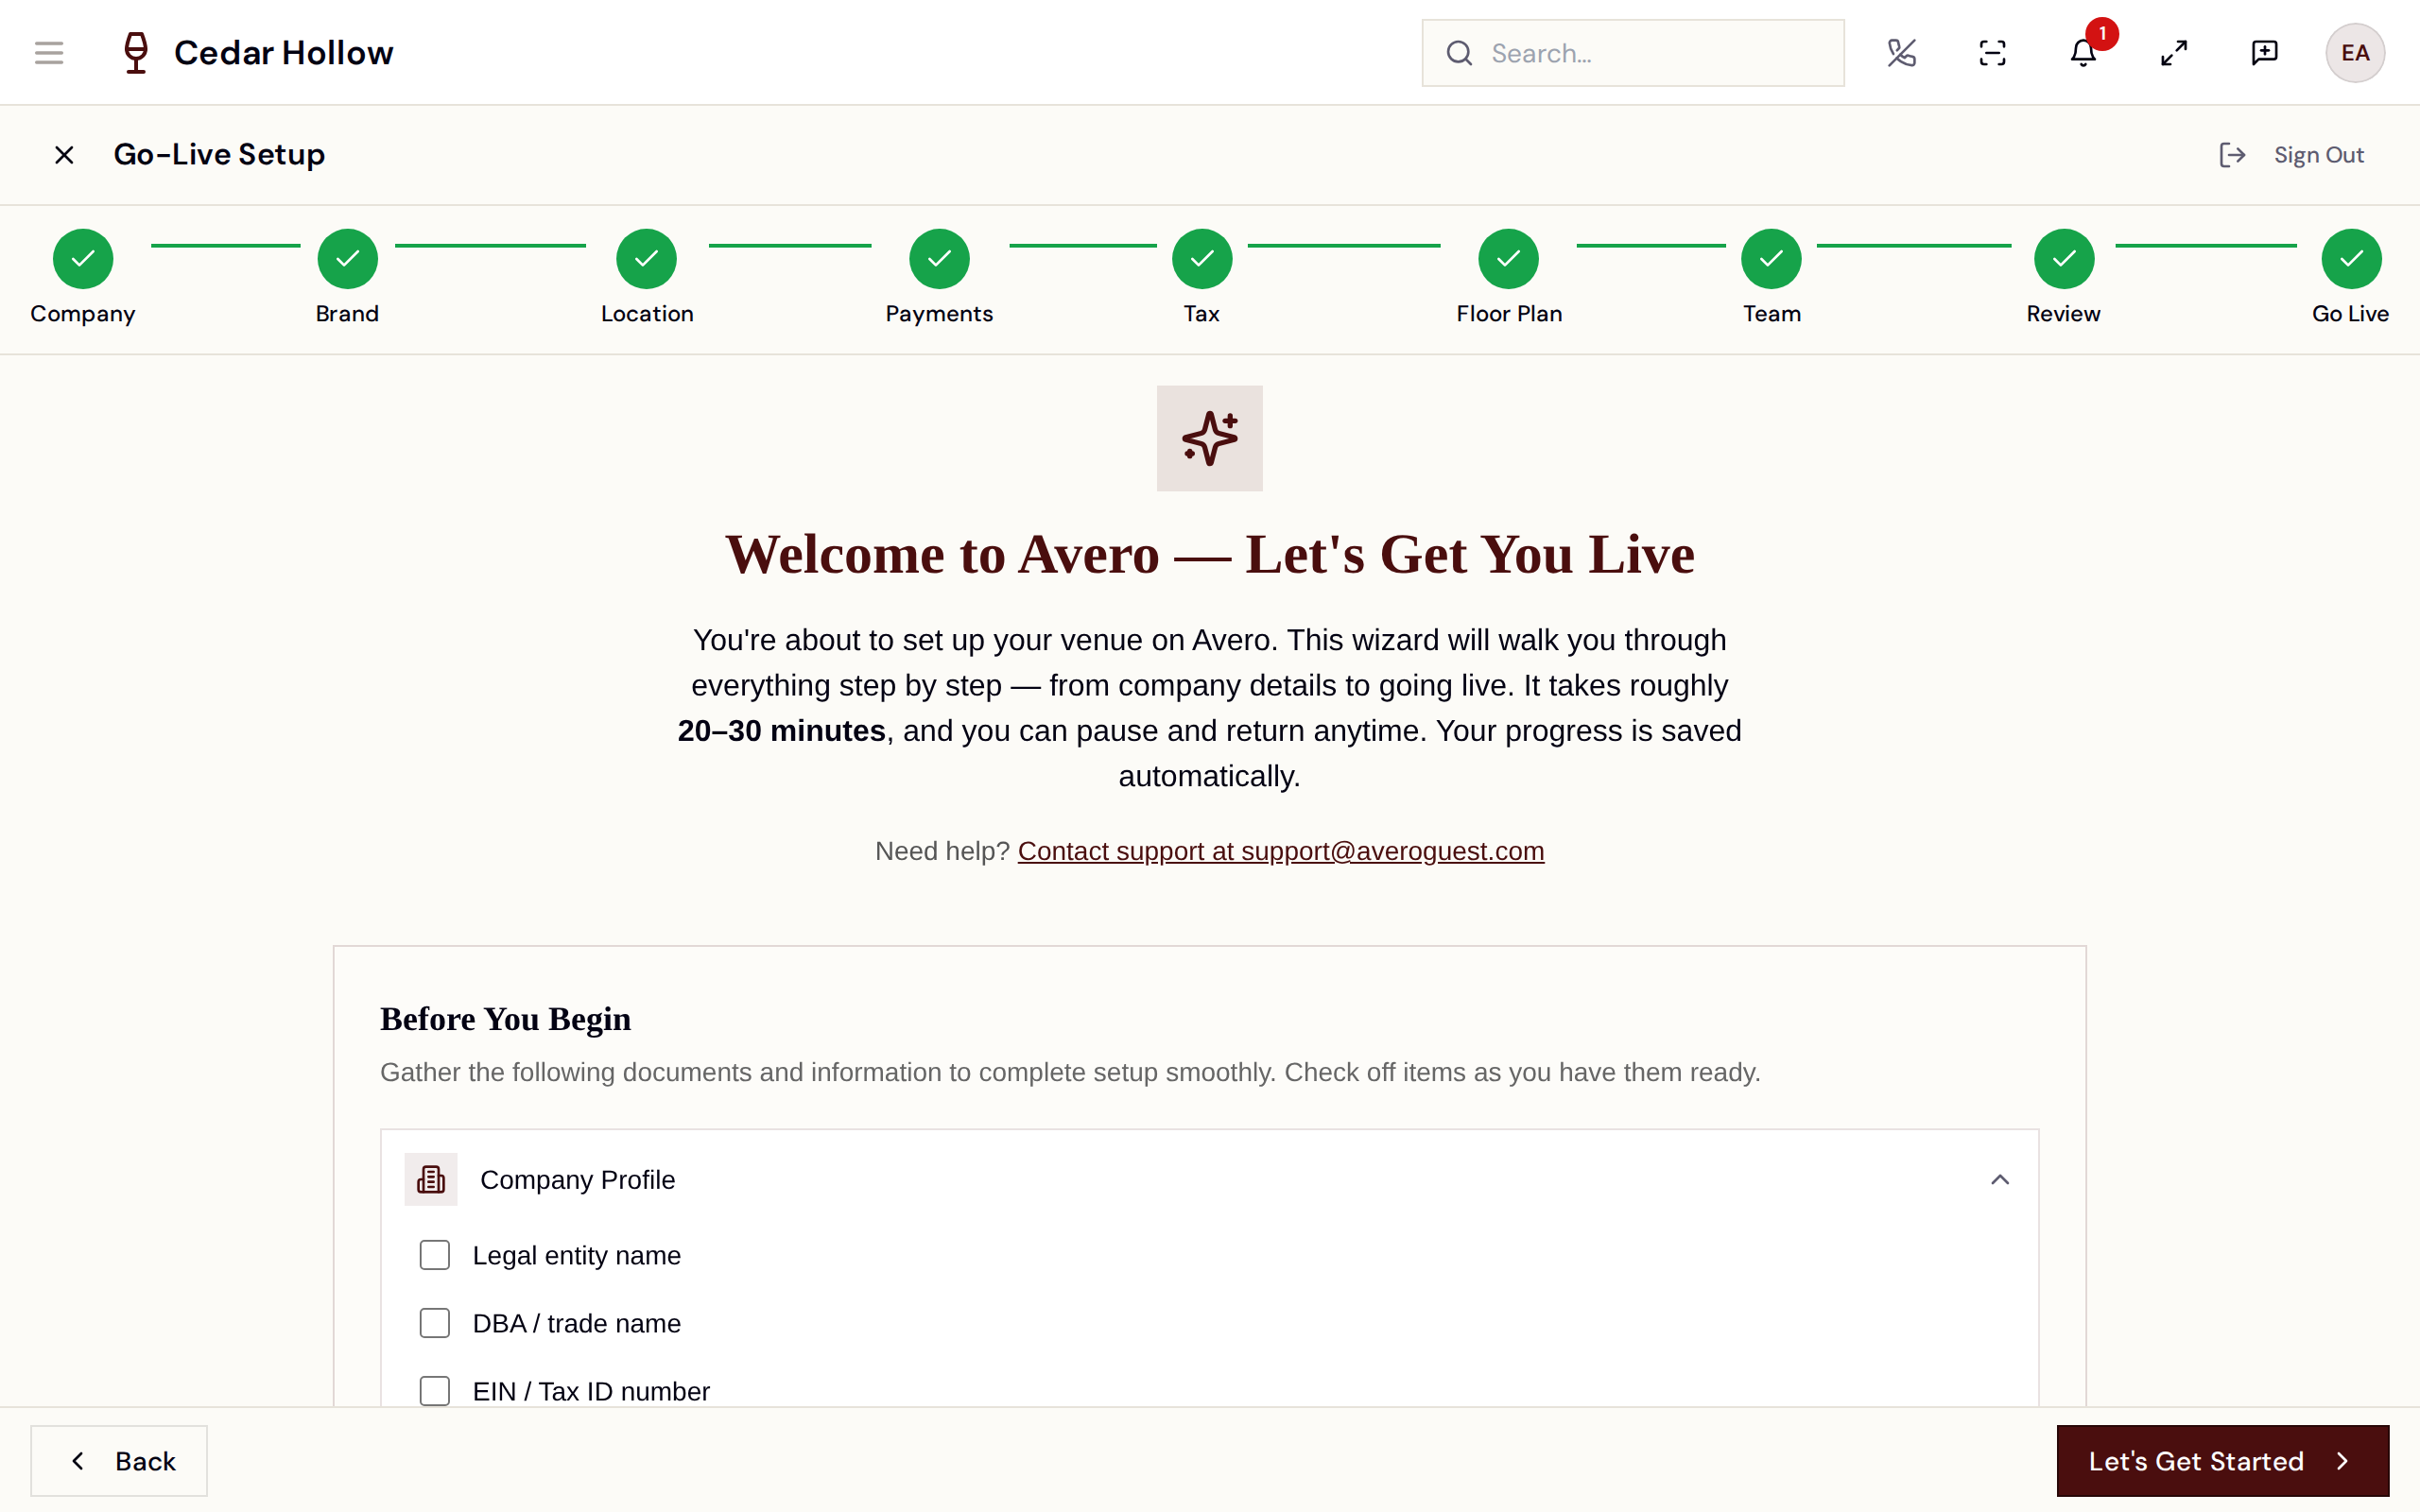
The Go-Live Setup wizard — grouped steps in the left rail, auto-saved as you go.
Plan for about 20–30 minutes. You don't have to finish in one sitting.
How the wizard works
- It auto-saves. Every change is saved automatically (you'll see a Saved indicator in the header) — so you can safely pause at any point.
- It's resumable. Come back whenever and it returns you to where you left off. It re-syncs when you switch back to the tab, so a trip out to Stripe and back won't lose your place.
- You can jump around. Click any step in the left rail to revisit it. Three steps — Company, Brand, Location — are required before you can go live.
- You're in setup mode until you go live. Until then, Avero keeps you in the wizard (only setup and a few related admin pages are reachable). Going live unlocks the full app.
Do this as an Admin — the person who created the account. Inviting the rest of the team happens inside the wizard (the Team step).
Before you begin — what to have ready
Gathering these first makes the wizard quick. Each item says why Avero needs it, so nothing is a surprise.
Company & legal
| Have ready | Why Avero needs it |
|---|---|
| Legal entity name (and DBA / trade name) | Your business identity on invoices, receipts, and records. |
| EIN / Tax ID | Business identification; validated if you enter it. |
| Primary contact email & phone | The account's main point of contact. |
| Company logo (optional now) | Shown in the app and on guest-facing surfaces. PNG/JPEG/WebP/SVG. |
| Alcohol minimum age (usually 21) | Drives POS age-eligibility checks — the app flags underage/unverified guests and can block alcohol items. |
Brand & storefront
| Have ready | Why Avero needs it |
|---|---|
| Brand display name and a short description | Your public, guest-facing identity. |
| URL slug (lowercase letters, numbers, hyphens) | The address of your online storefront. |
Location
| Have ready | Why Avero needs it |
|---|---|
| Physical / mailing address | Compliance, tax origin, and guest information. |
| Time zone | Drives reservation slots and reporting — set it correctly here. |
| Hours and location phone | Availability and contact. |
Payments (Stripe)
| Have ready | Why Avero needs it |
|---|---|
| Legal business details | Stripe Connect verification (KYC) so you can accept payments. |
| Beneficial owner — name, DOB, address | Required by Stripe to verify the business. |
| Bank routing & account number | Where your payouts land. |
| Statement descriptor | The text guests see on their card statement. |
Tax
| Have ready | Why Avero needs it |
|---|---|
| Sales-tax nexus states | The states where you're registered to collect tax. |
| Existing tax permit IDs | Your registration references. |
Floor plan
| Have ready | Why Avero needs it |
|---|---|
| Room / surface names, table names | Your live floor map and seating. |
| Seating capacities, table shapes | Party sizing and the visual layout. |
Team
| Have ready | Why Avero needs it |
|---|---|
| Admin & staff email addresses | To invite them. |
| Intended roles | What each person can do (see Invite your team). |
Wine club (only if you'll run one)
| Have ready | Why Avero needs it |
|---|---|
| Membership tier names & pricing | Your club definitions. |
| Billing cadence, fulfillment rules | Release schedule and shipping. |
The steps
1. Welcome & preparation
The opening step is the checklist above, in-app — expand each group and tick off what you've gathered. Nothing here is saved to your account; it's just a launchpad. Choose Let's Get Started when you're ready.
The Welcome step lists what to gather for each step ahead.
2. Company Profile
Your legal identity.
- Legal name (required — legal name or DBA) and DBA / trade name.
- Primary email (required) and phone (optional).
- EIN / Tax ID (optional) — validated for format if you enter it.
- Alcohol minimum age — defaults to 21. This isn't cosmetic: Avero compares each guest's age to it and flags underage / unverified guests, and can block alcohol items at the POS.
- Enable ID scan — turns on ID-scan age verification for alcohol service.
- Logo (optional).
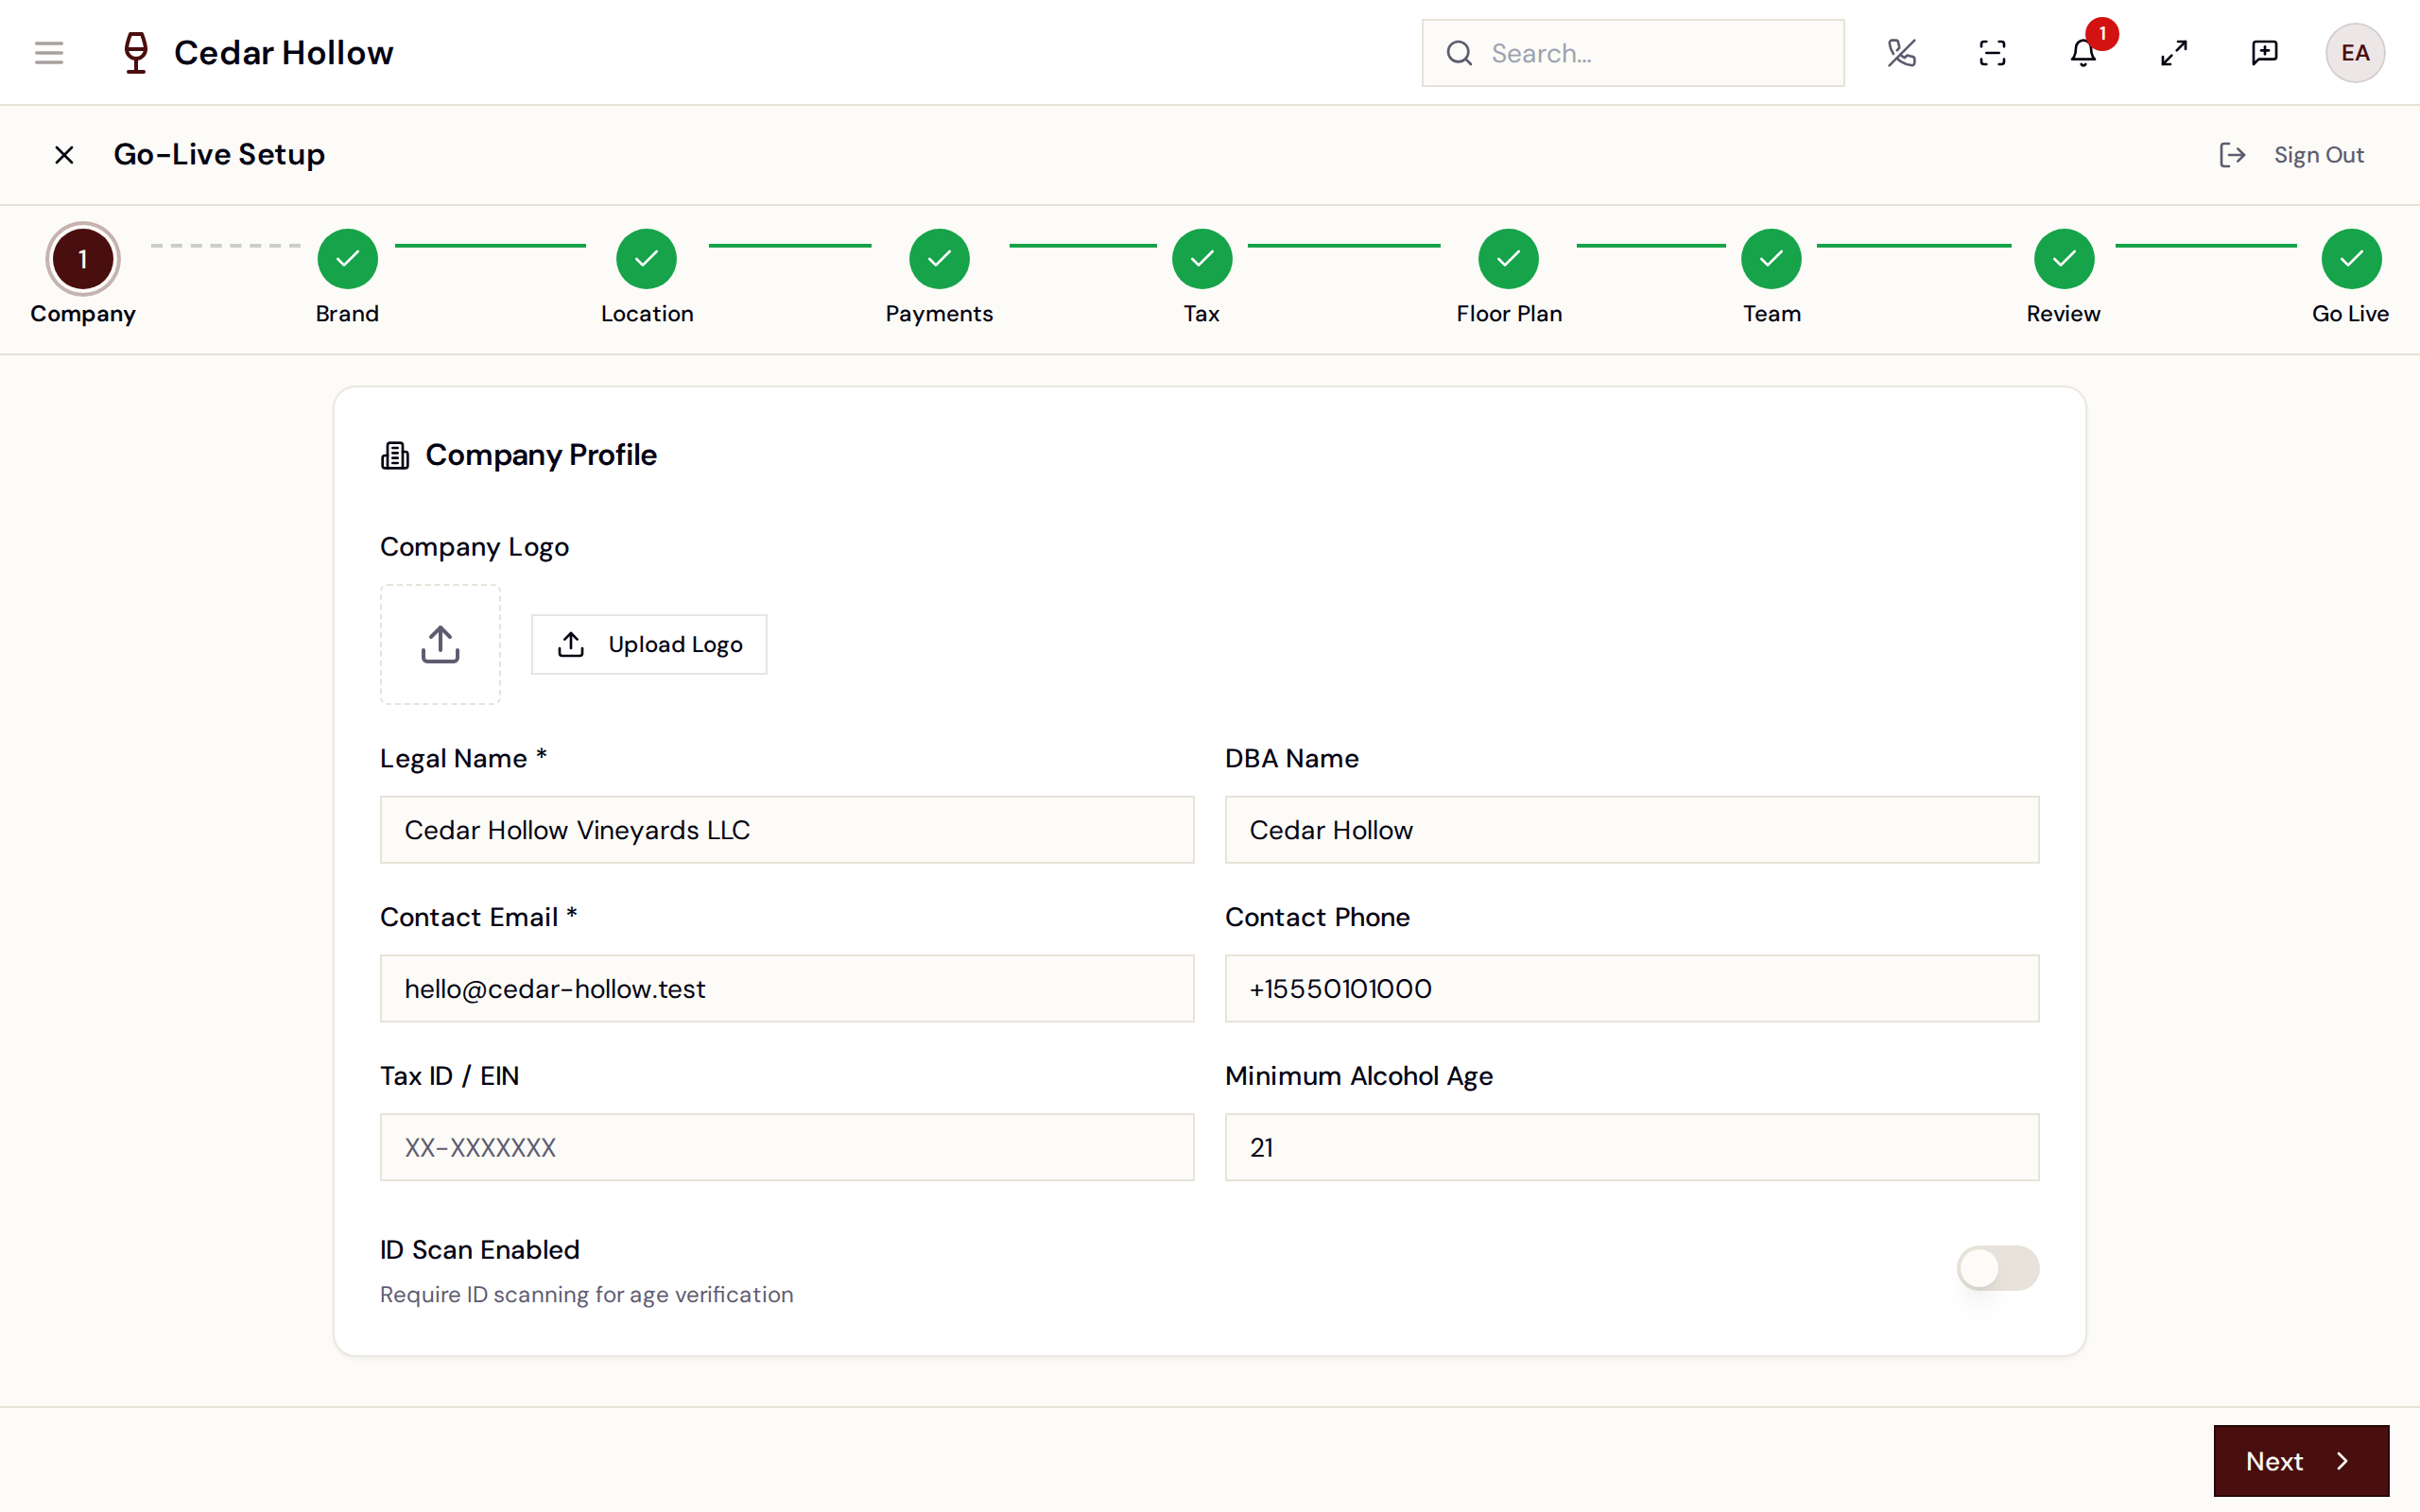
Company Profile — legal entity, Tax ID, contact, and alcohol settings.
3. Brand
Your public, guest-facing identity.
- Brand name (required), display name and description (optional).
- URL slug (required) — lowercase letters, numbers, and hyphens only. This becomes your storefront address.
- Wine club toggle — appears here once the wine-club capability is on (you enable that in the Location step).
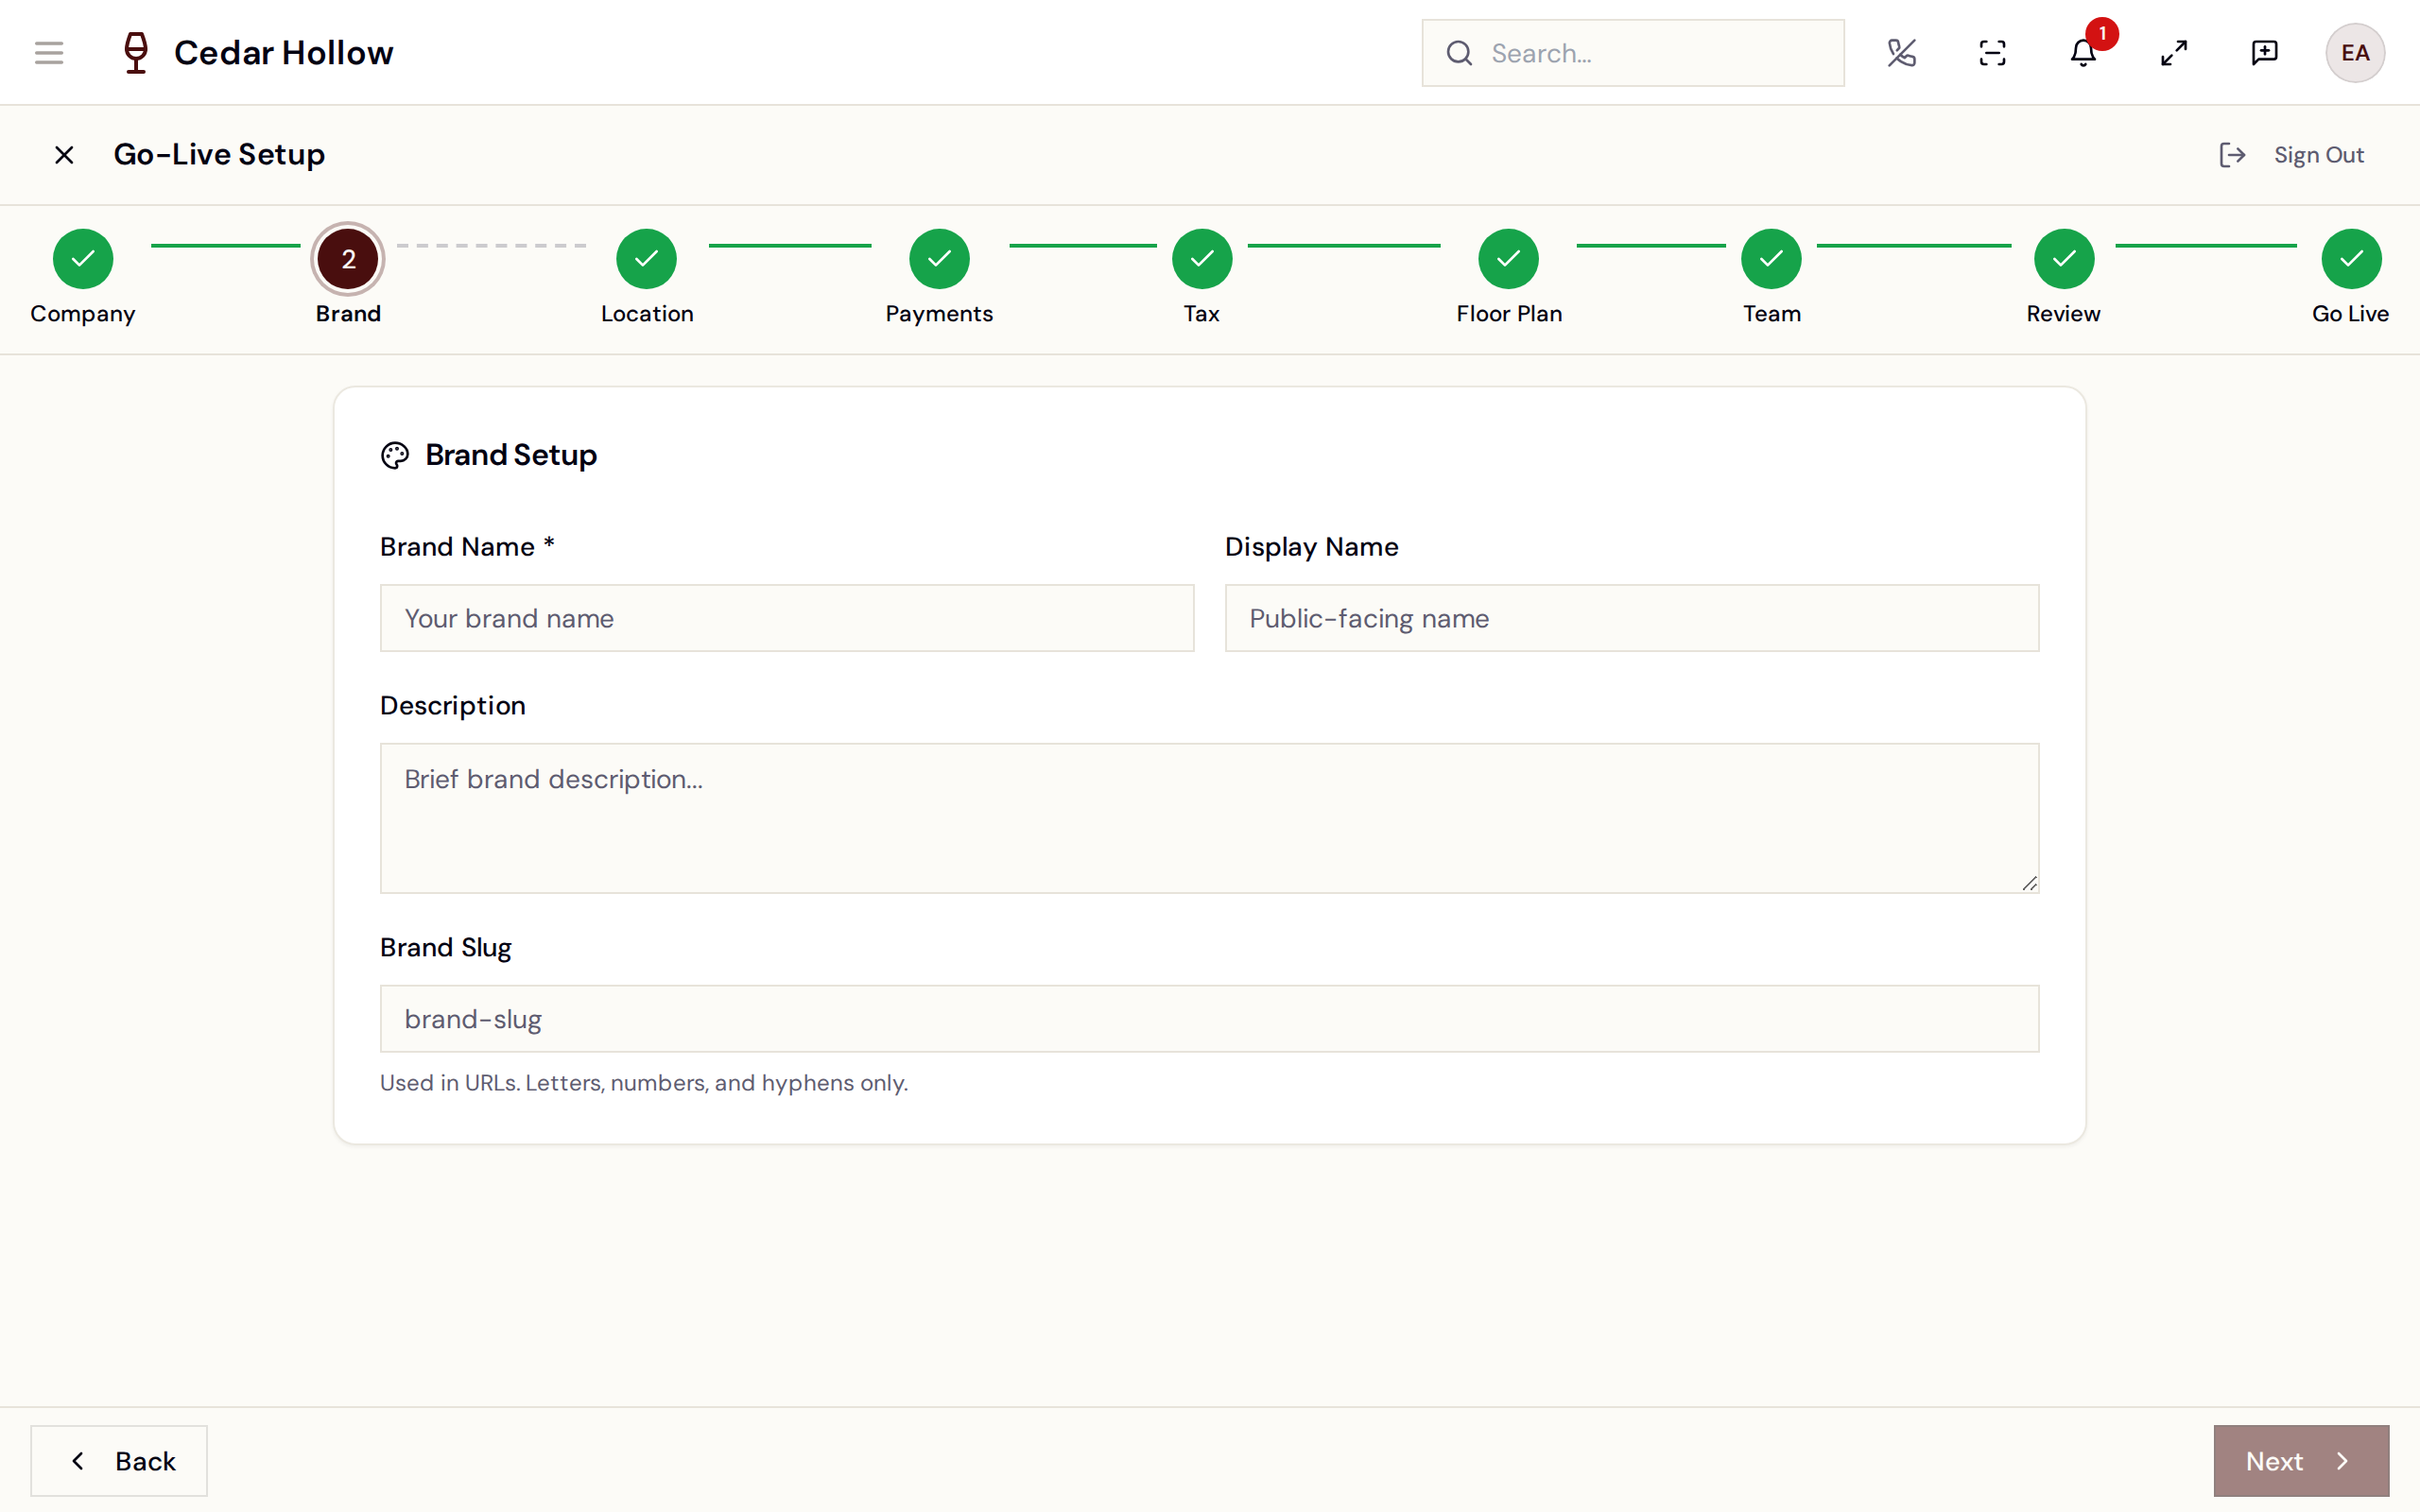
Brand — display name, description, and your storefront URL slug.
4. Location
Where you operate — and the step that shapes availability.
- Location name and full address (required). The address field autocompletes and fills city/state/ZIP/country.
- Time zone (required) — set this correctly; it drives reservation slots and reporting.
- Phone (optional), hours, and capabilities (Reservations and POS are on by default; you can also turn on Wine Club, Events, and E-commerce).
- Starter template (optional) — seeds sample tables, products, and experiences so you have something to work from. Sample data is clearly marked and doesn't count toward readiness (you clear it in the Floor Plan step).
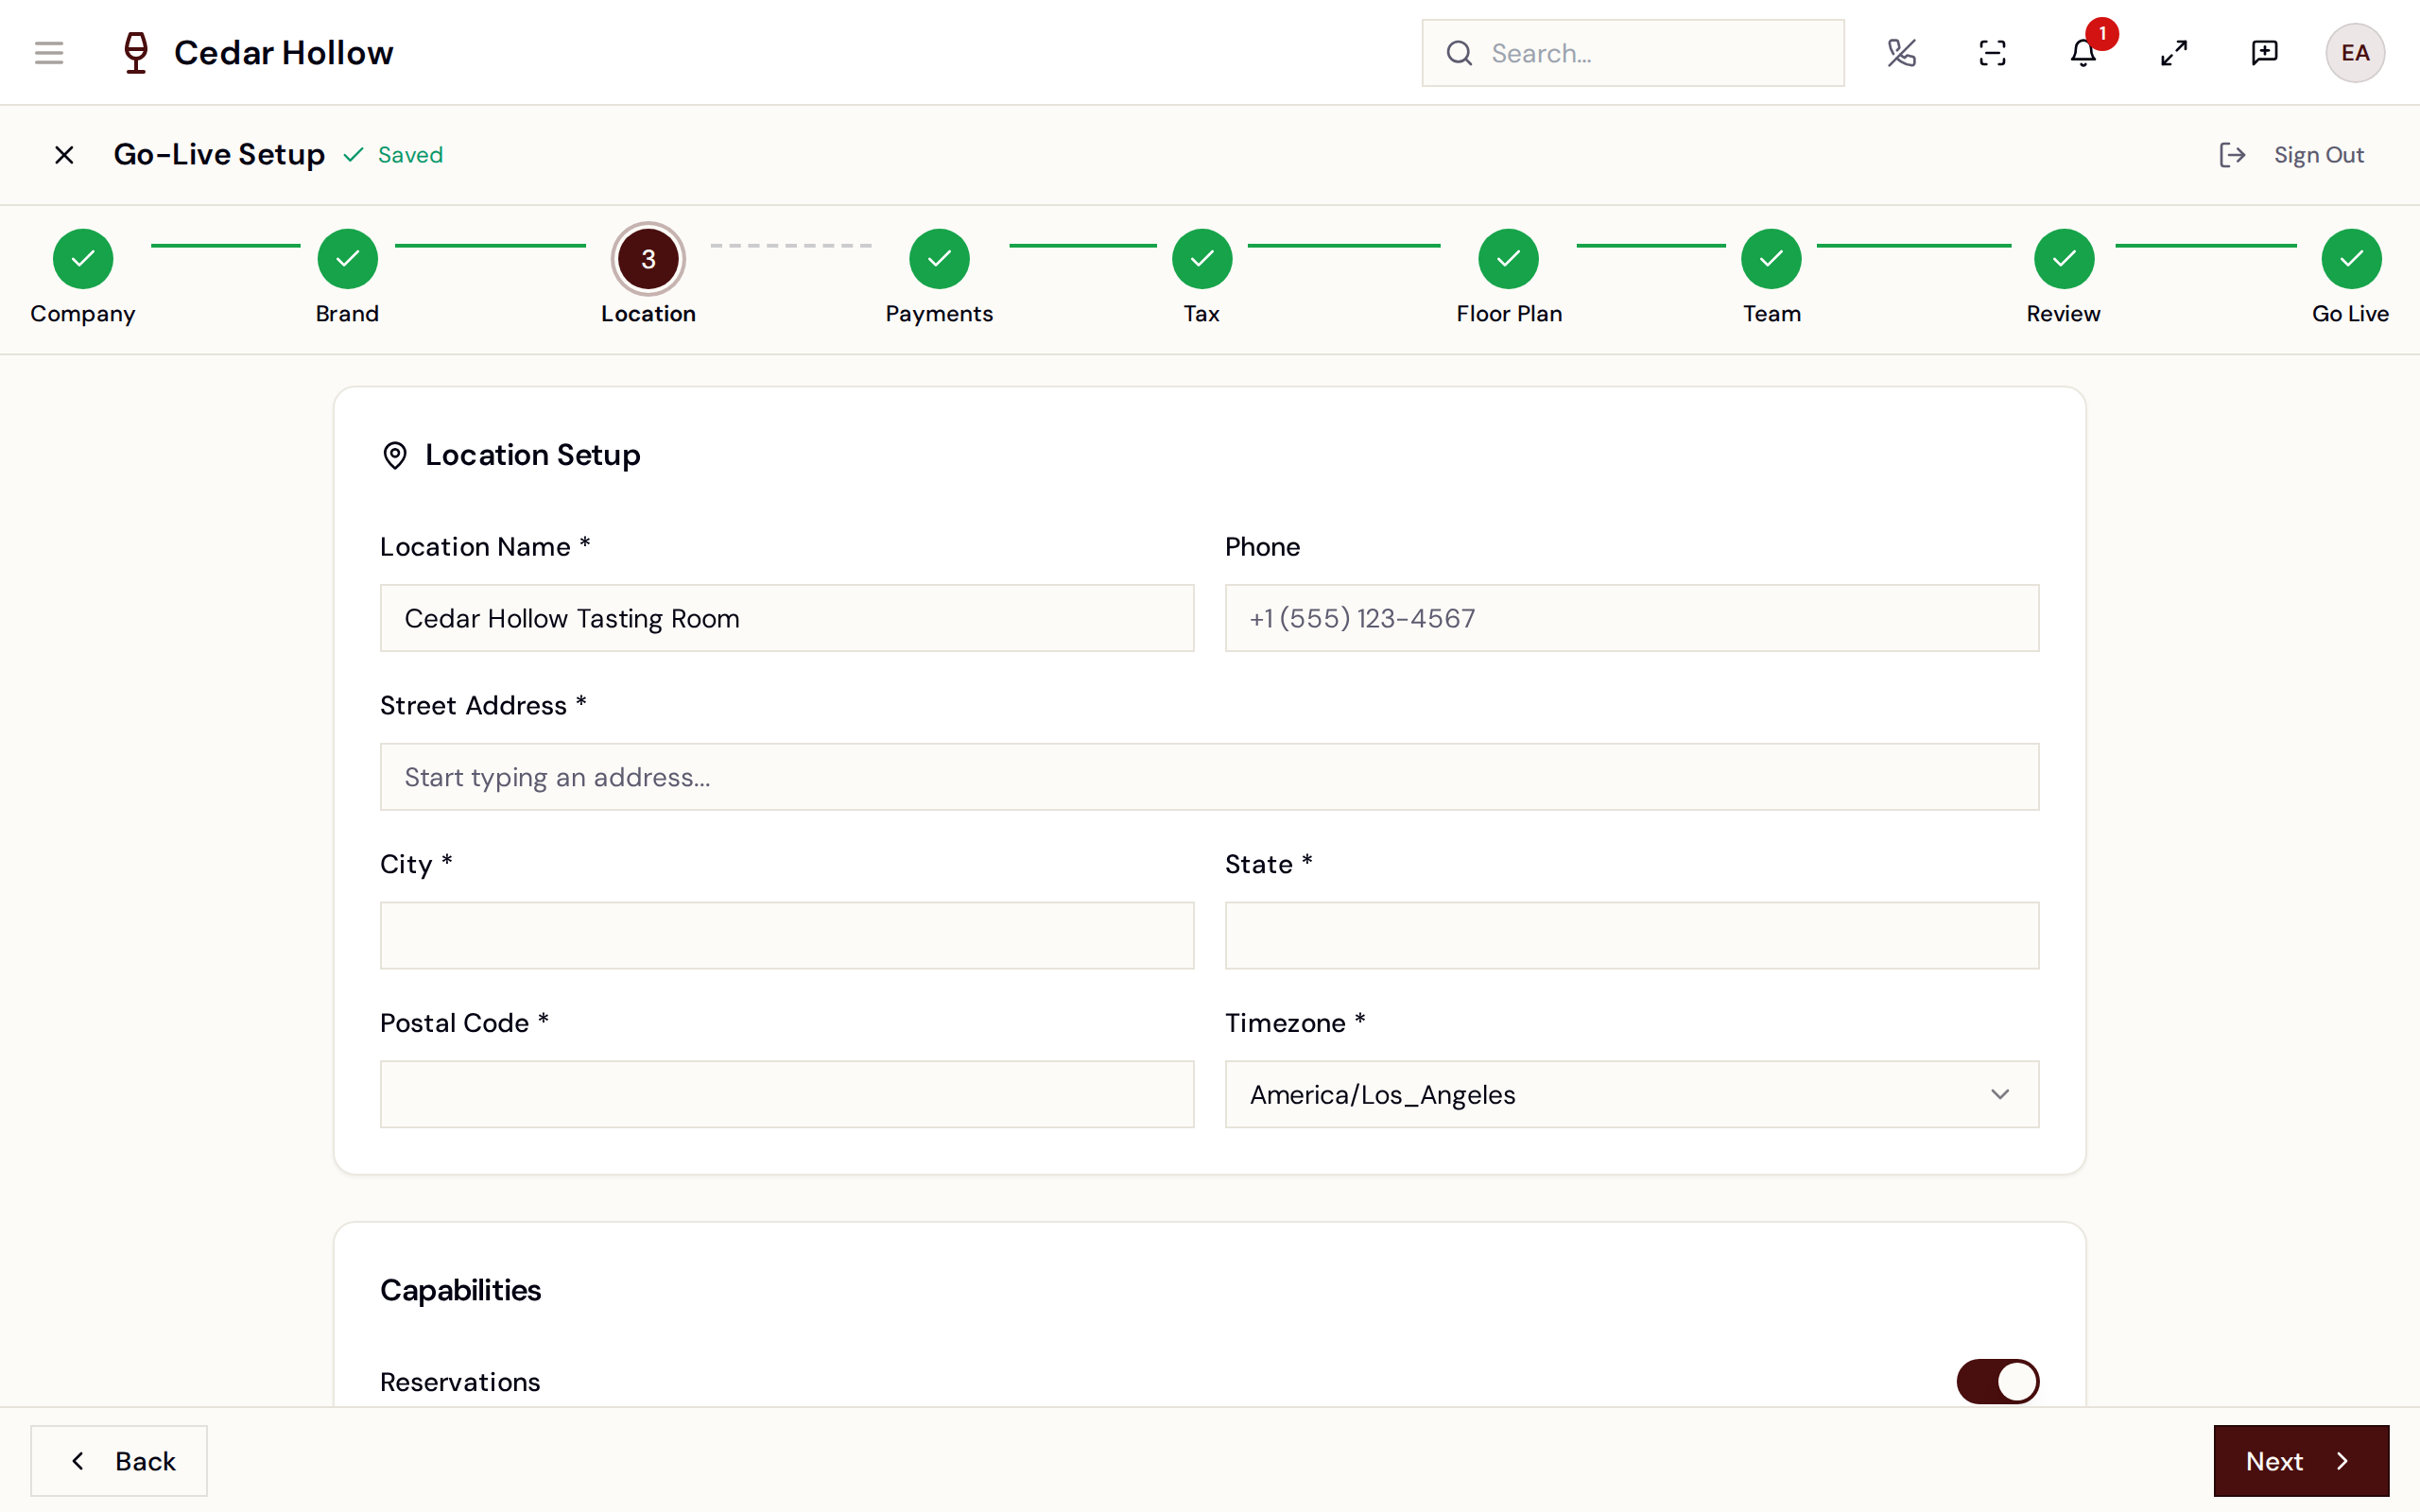
Location — address, time zone, hours, and capabilities.
Set your time zone here before you take any bookings. Changing it after reservations exist can shift existing times.
The Wine Club step only appears if you enable the Wine Club capability here in Location. Turn it on now if you plan to run a club.
5. Payments (Stripe Connect)
Avero processes payments through Stripe Connect so tasting-room, storefront, club, and event sales settle in one place.
Choose Set Up Stripe Payments and Avero hands you to Stripe's secure onboarding to enter your business details, beneficial owner, and bank account. When you finish, Stripe returns you right back to this step. The step then shows your status:
- Not connected — you haven't started (or need to resume).
- Verification in progress — Stripe is reviewing; it lists anything still needed (e.g. "Bank account for payouts").
- Connected — charges and payouts are enabled. ✅
Use Refresh Status if you completed Stripe in another tab and the badge hasn't caught up.
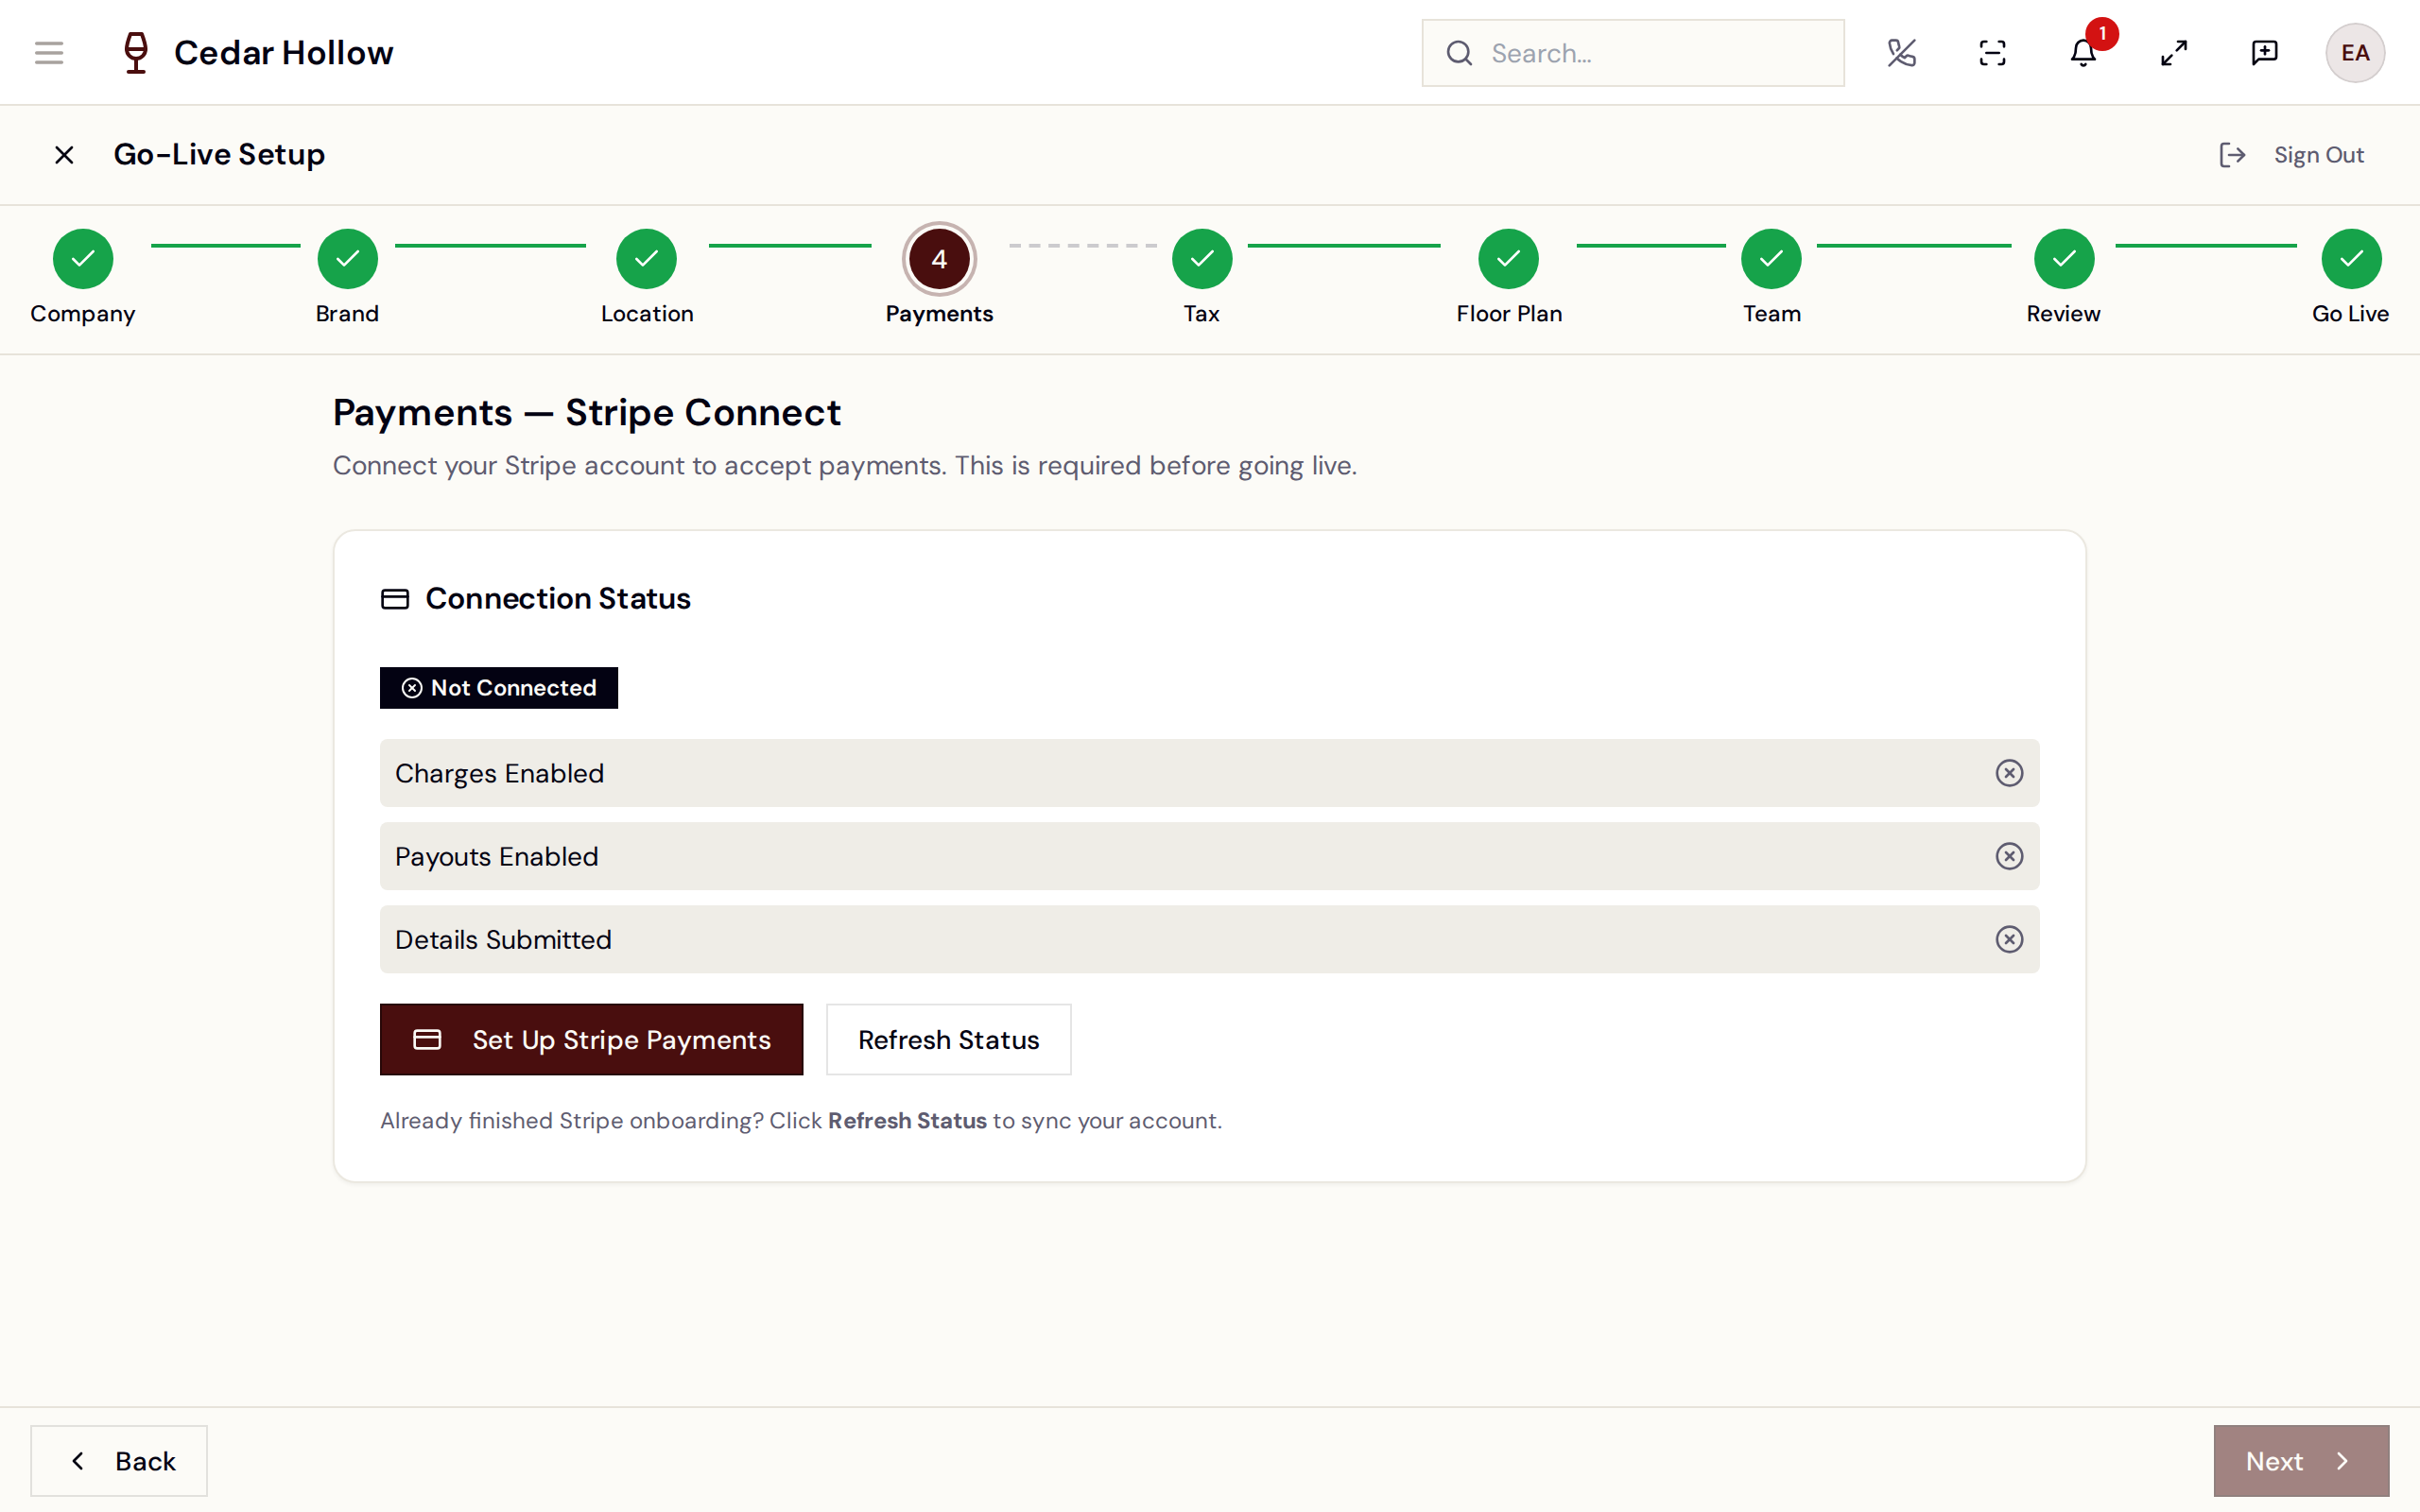
Payments — connect Stripe for card processing and payouts.
The Stripe step opens Stripe's own onboarding and then returns you to the wizard. Have your bank routing/account number and beneficial-owner details handy.
6. Tax
Configure where you collect sales tax.
- Your validated origin address (from the Location step) is shown up top.
- Add each nexus state — the two-letter state code and name — for the states where you're registered. Remove any you added by mistake.
Tax calculation and filing run in the background from these settings; you don't enter tax-provider credentials here.
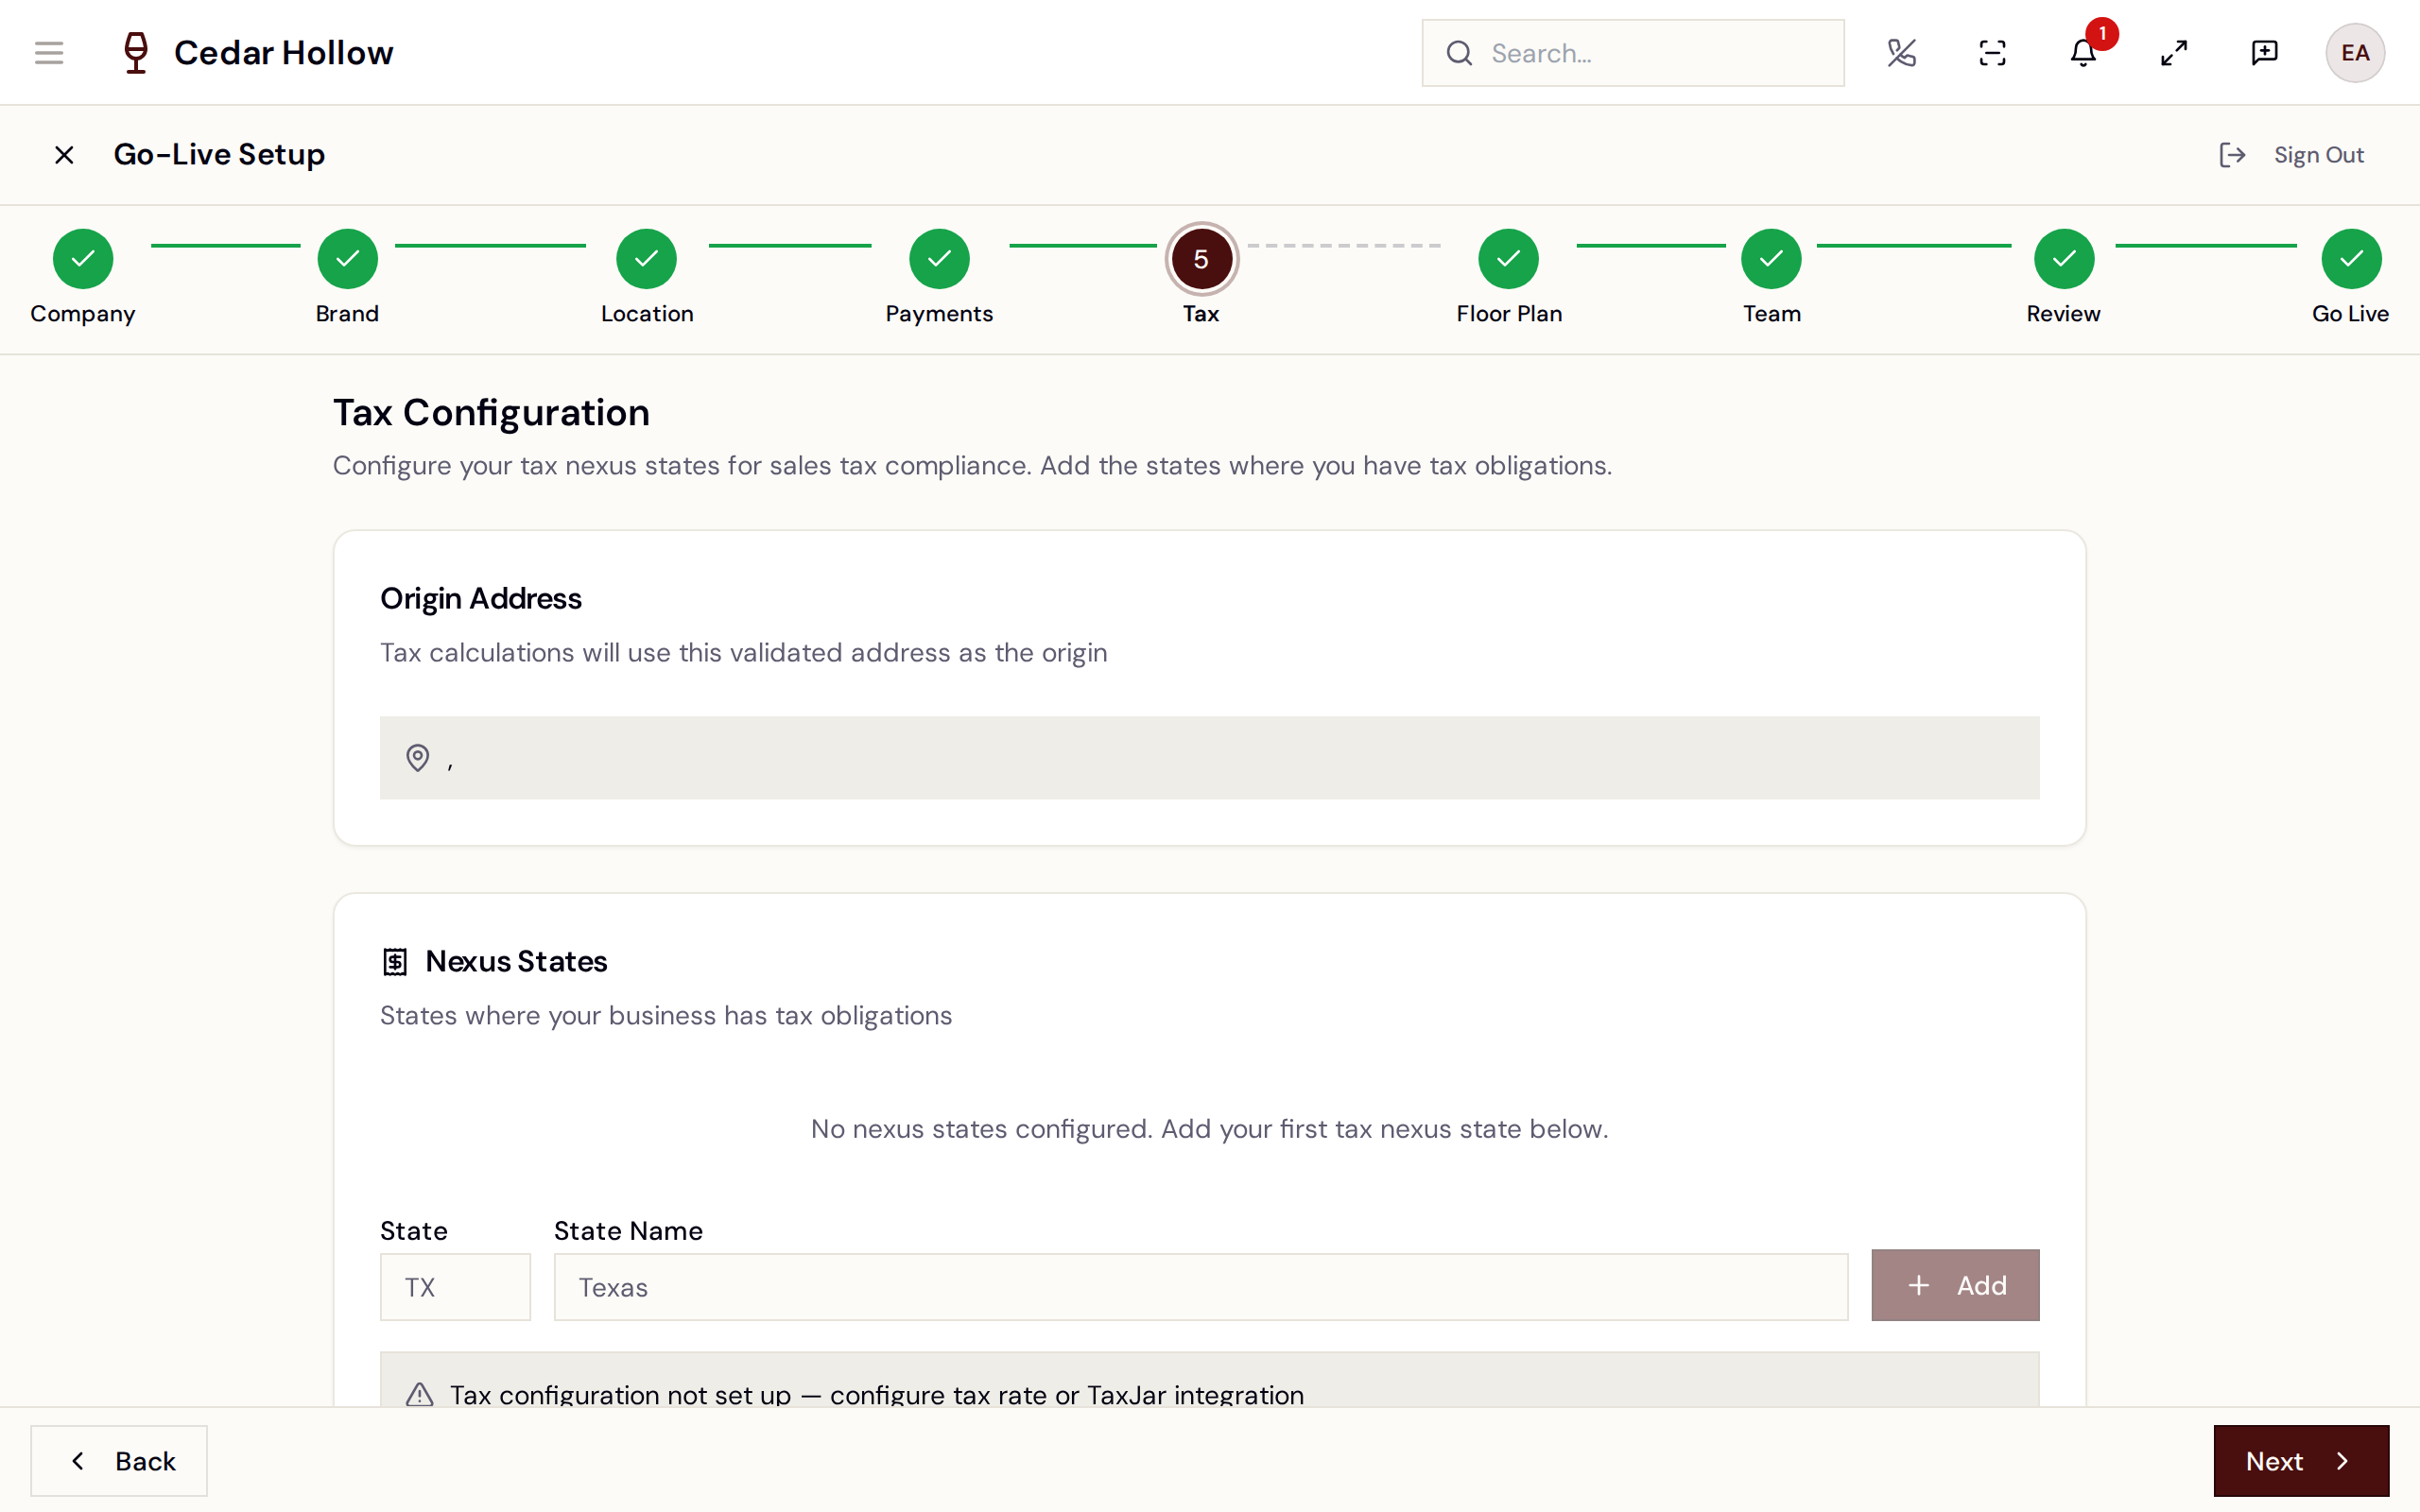
Tax — add the states where you're registered to collect.
You can move past Tax without completing it — it isn't required to go live — but setting your nexus states now means correct tax from day one.
7. Floor Plan
Build enough of your room to seat and reserve guests.
- Add a surface (a dining area — "Main Tasting Room," "Patio," "VIP Lounge") with a name and color.
- Add at least one table to it — name, seating capacity (1–20), and a shape/icon.
- If you seeded a starter template, those sample rows are marked as samples. Use Clear sample data, then add your real surfaces and tables.
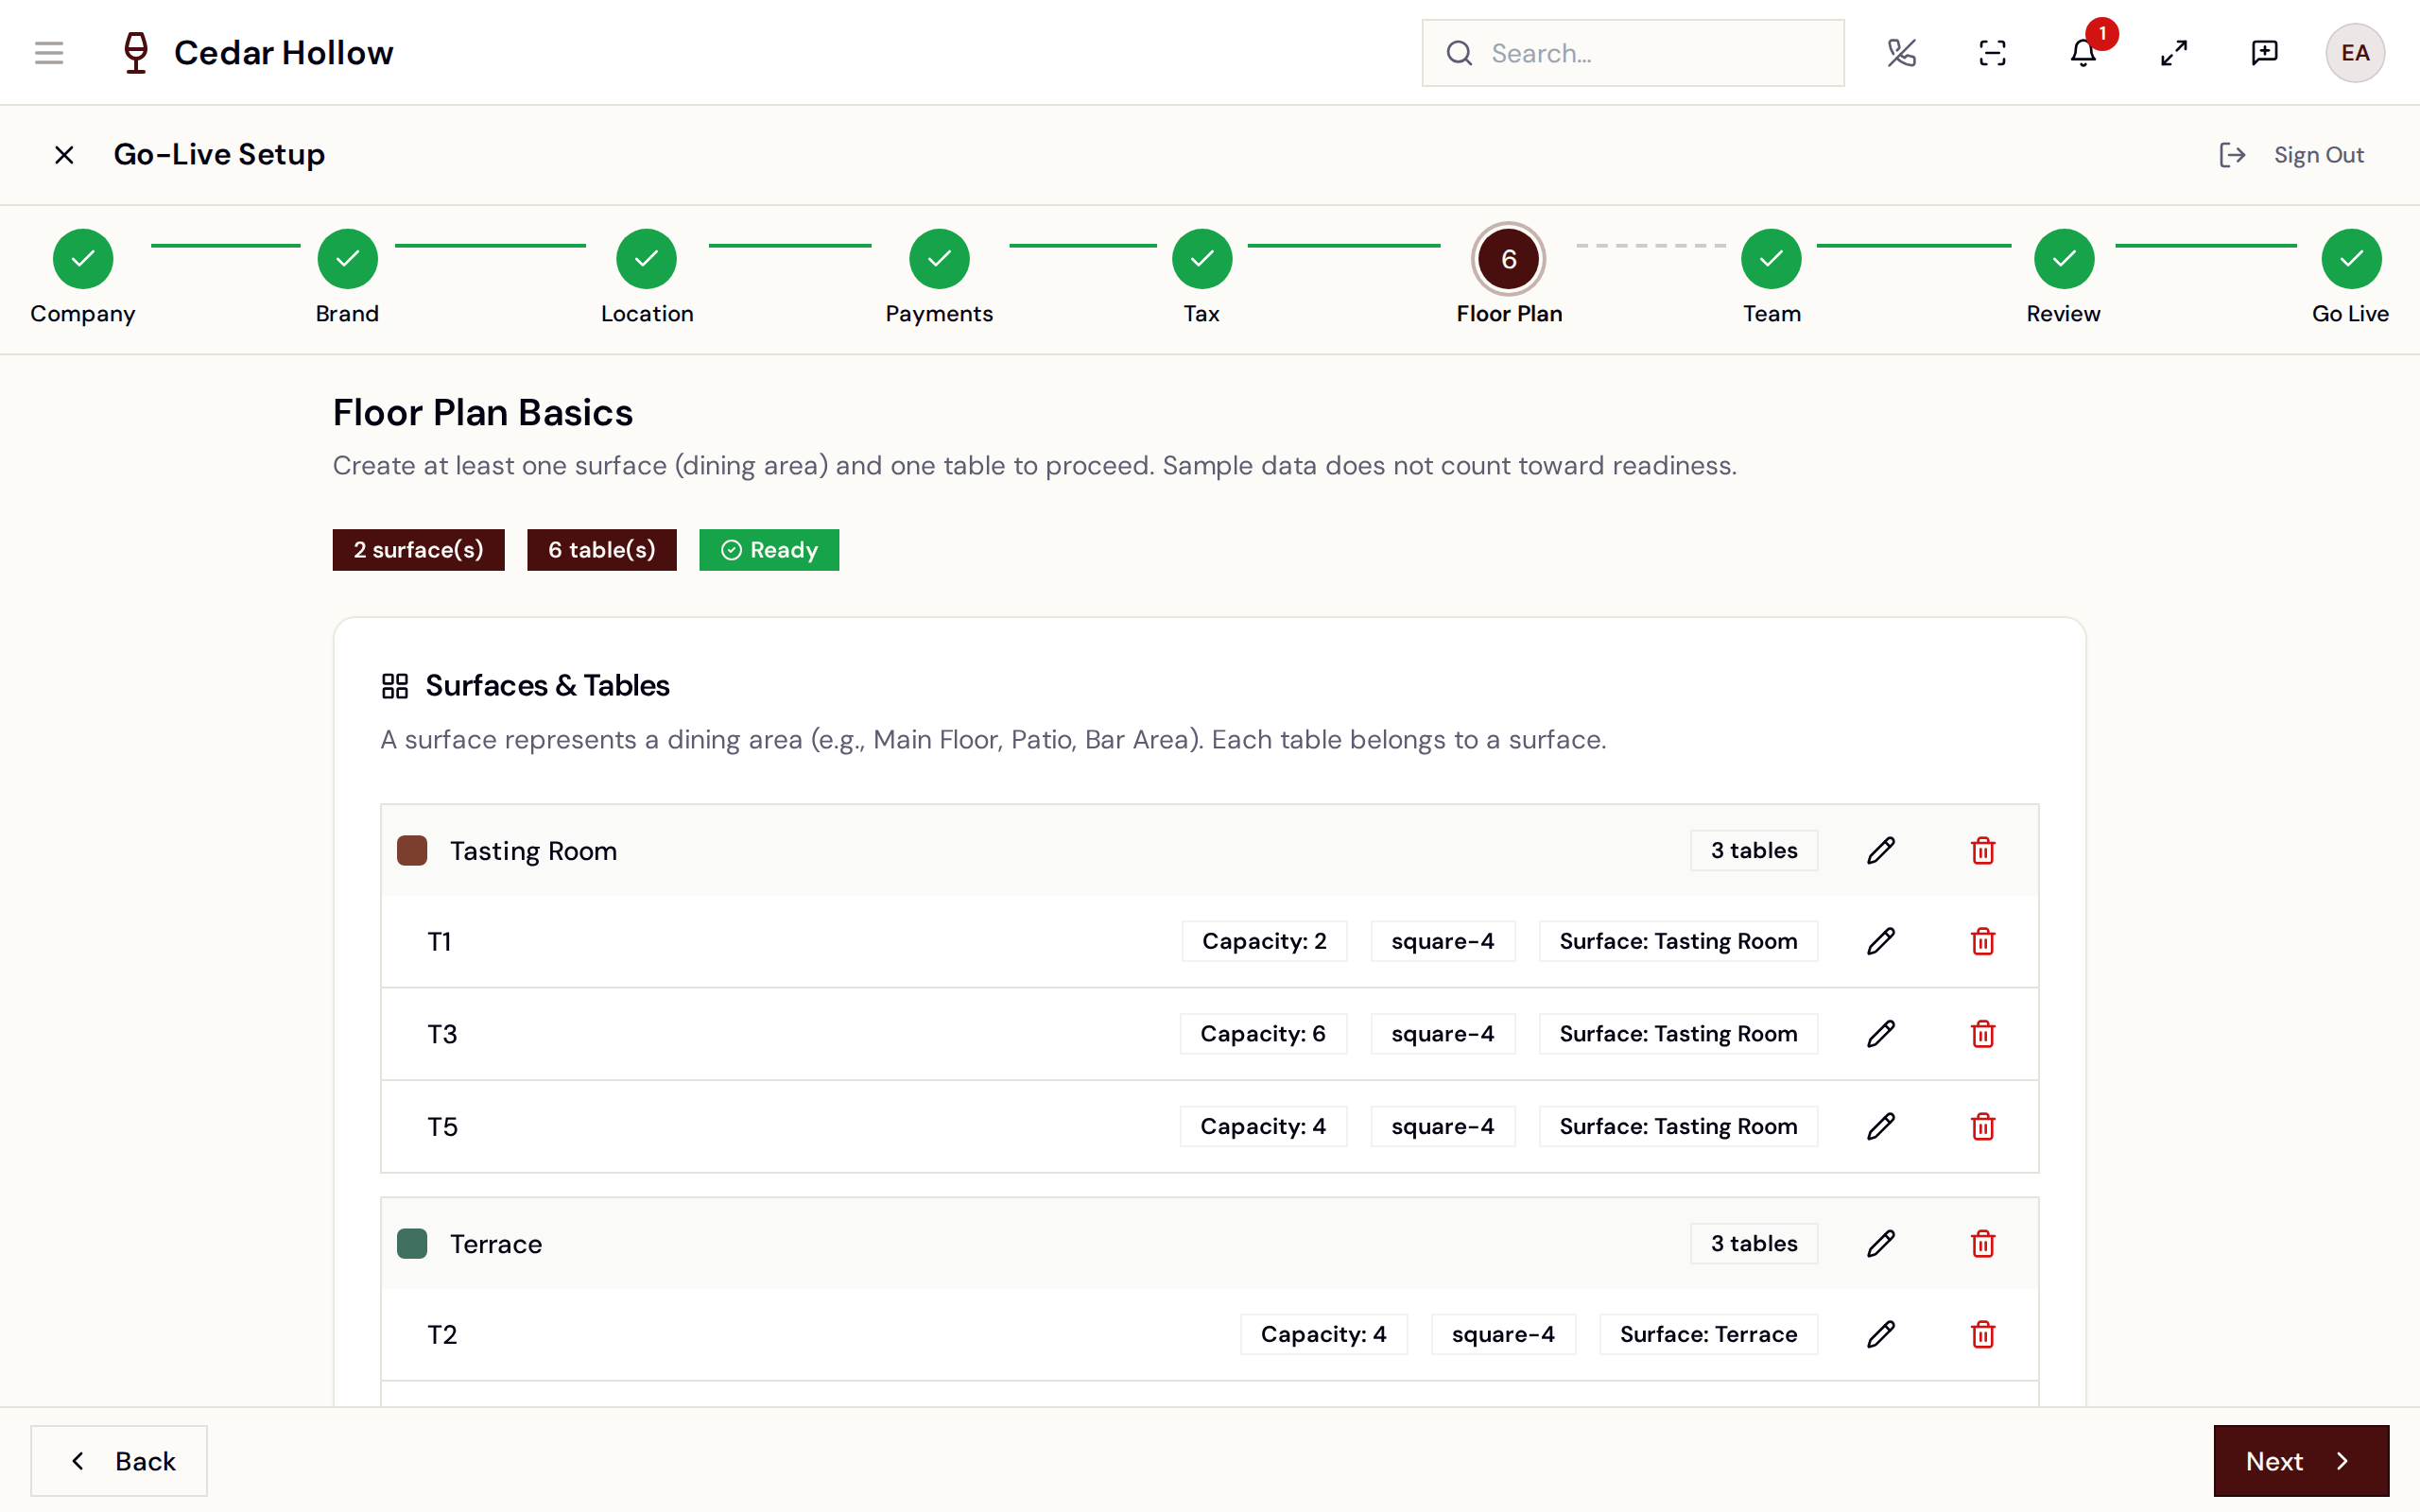
Floor Plan — add real surfaces and tables (sample rows don't count).
Floor Plan shows Ready once you have at least one real surface and one real table. Sample rows don't count.
For a detailed layout, choose Open full Floor Plan editor. It opens the full editor; a Return to setup banner brings you right back to this step when you're done.
8. Team
Invite the people who'll run the day.
- Avero ships default roles — Admin, Manager, and Host / Cashier.
- Invite each person by email and pick a role; they get an invitation to set a password and sign in.
At least one Admin must exist to go live. Full role details are in Invite your team.
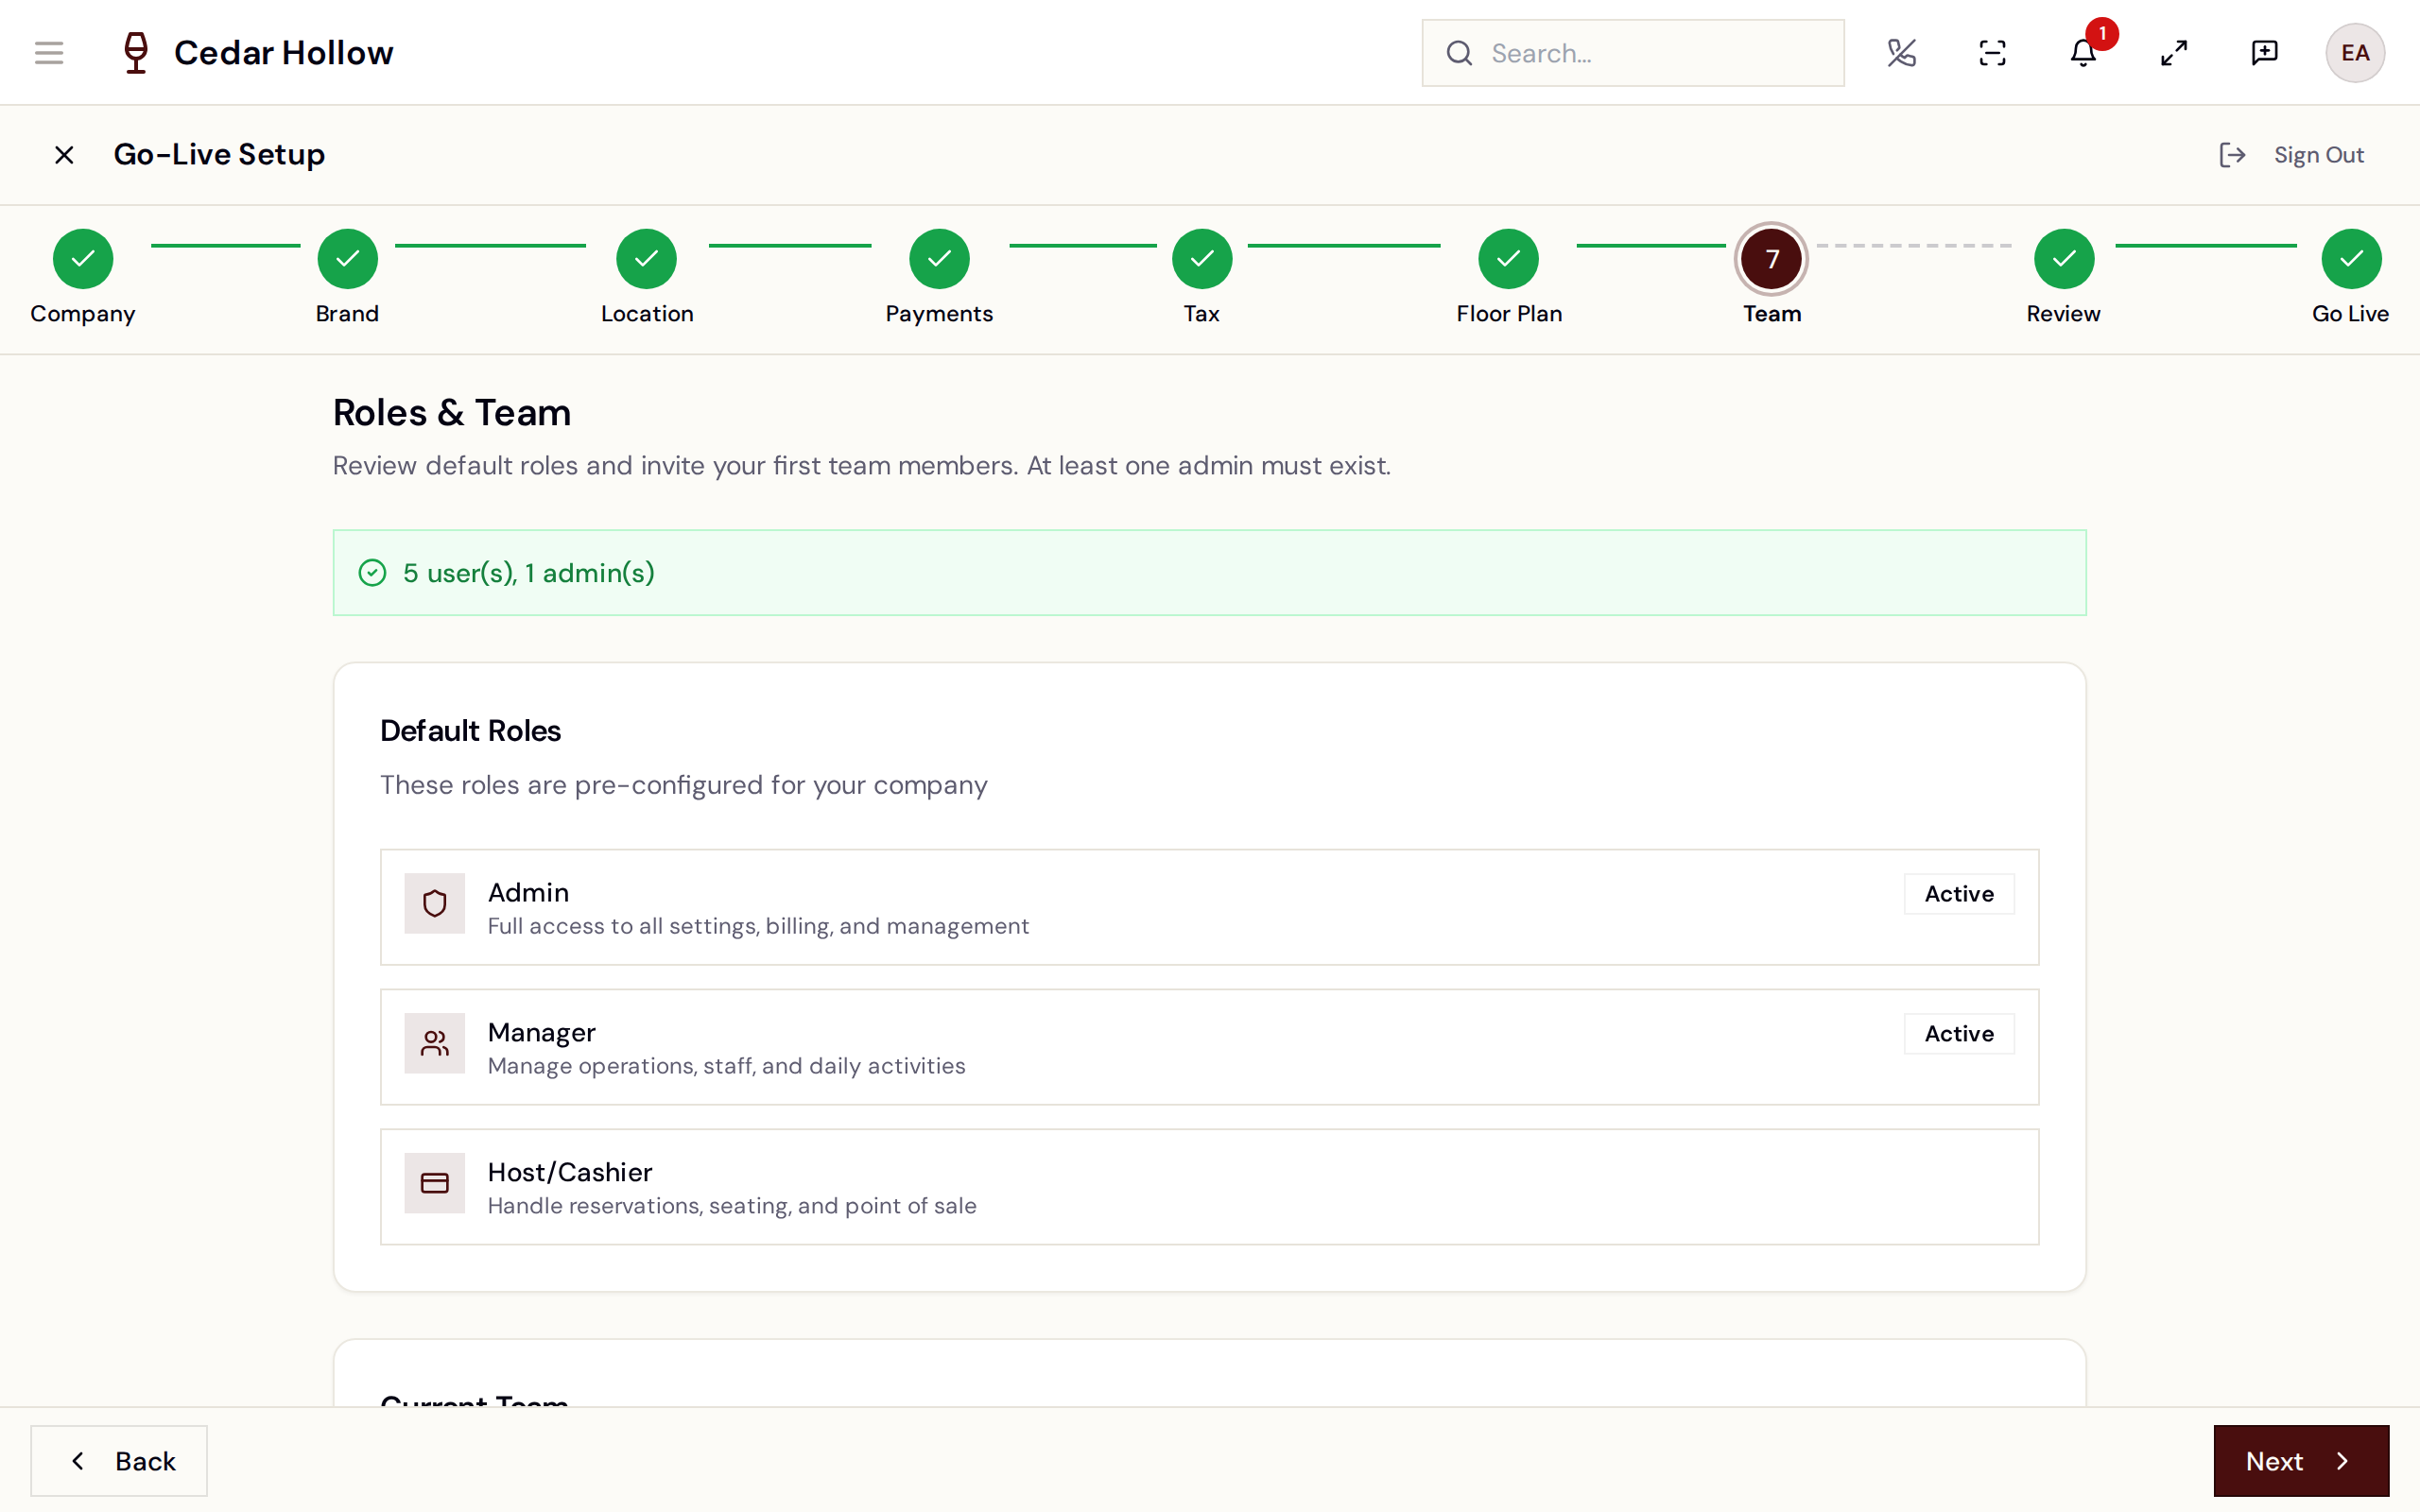
Team — invite staff and assign roles.
9. Wine Club (optional)
This step appears only if you enabled the Wine Club capability in Location.
Create your first membership tier — start from a preset (e.g. Estate 3/6/12 bottle, quarterly) or build your own:
- Club name (required) and optional display name.
- Bottles per release (required, a positive number) and shipments per year (4 / 6 / 12 / 2).
- Member discount % (optional) and the release months.
You can refine everything later in the full Wine Club area — this just gets your first club defined.
Wine Club — define your first membership tier (optional).
10. Review
A readiness summary. Each gate shows Ready or Required:
- Address validation, Payments, Tax, Floor Plan, Roles & Team.
To go live you need Payments, Floor Plan, Team, and a validated address — Tax is shown here but isn't a blocker. When everything required passes, you'll see All checks passed.
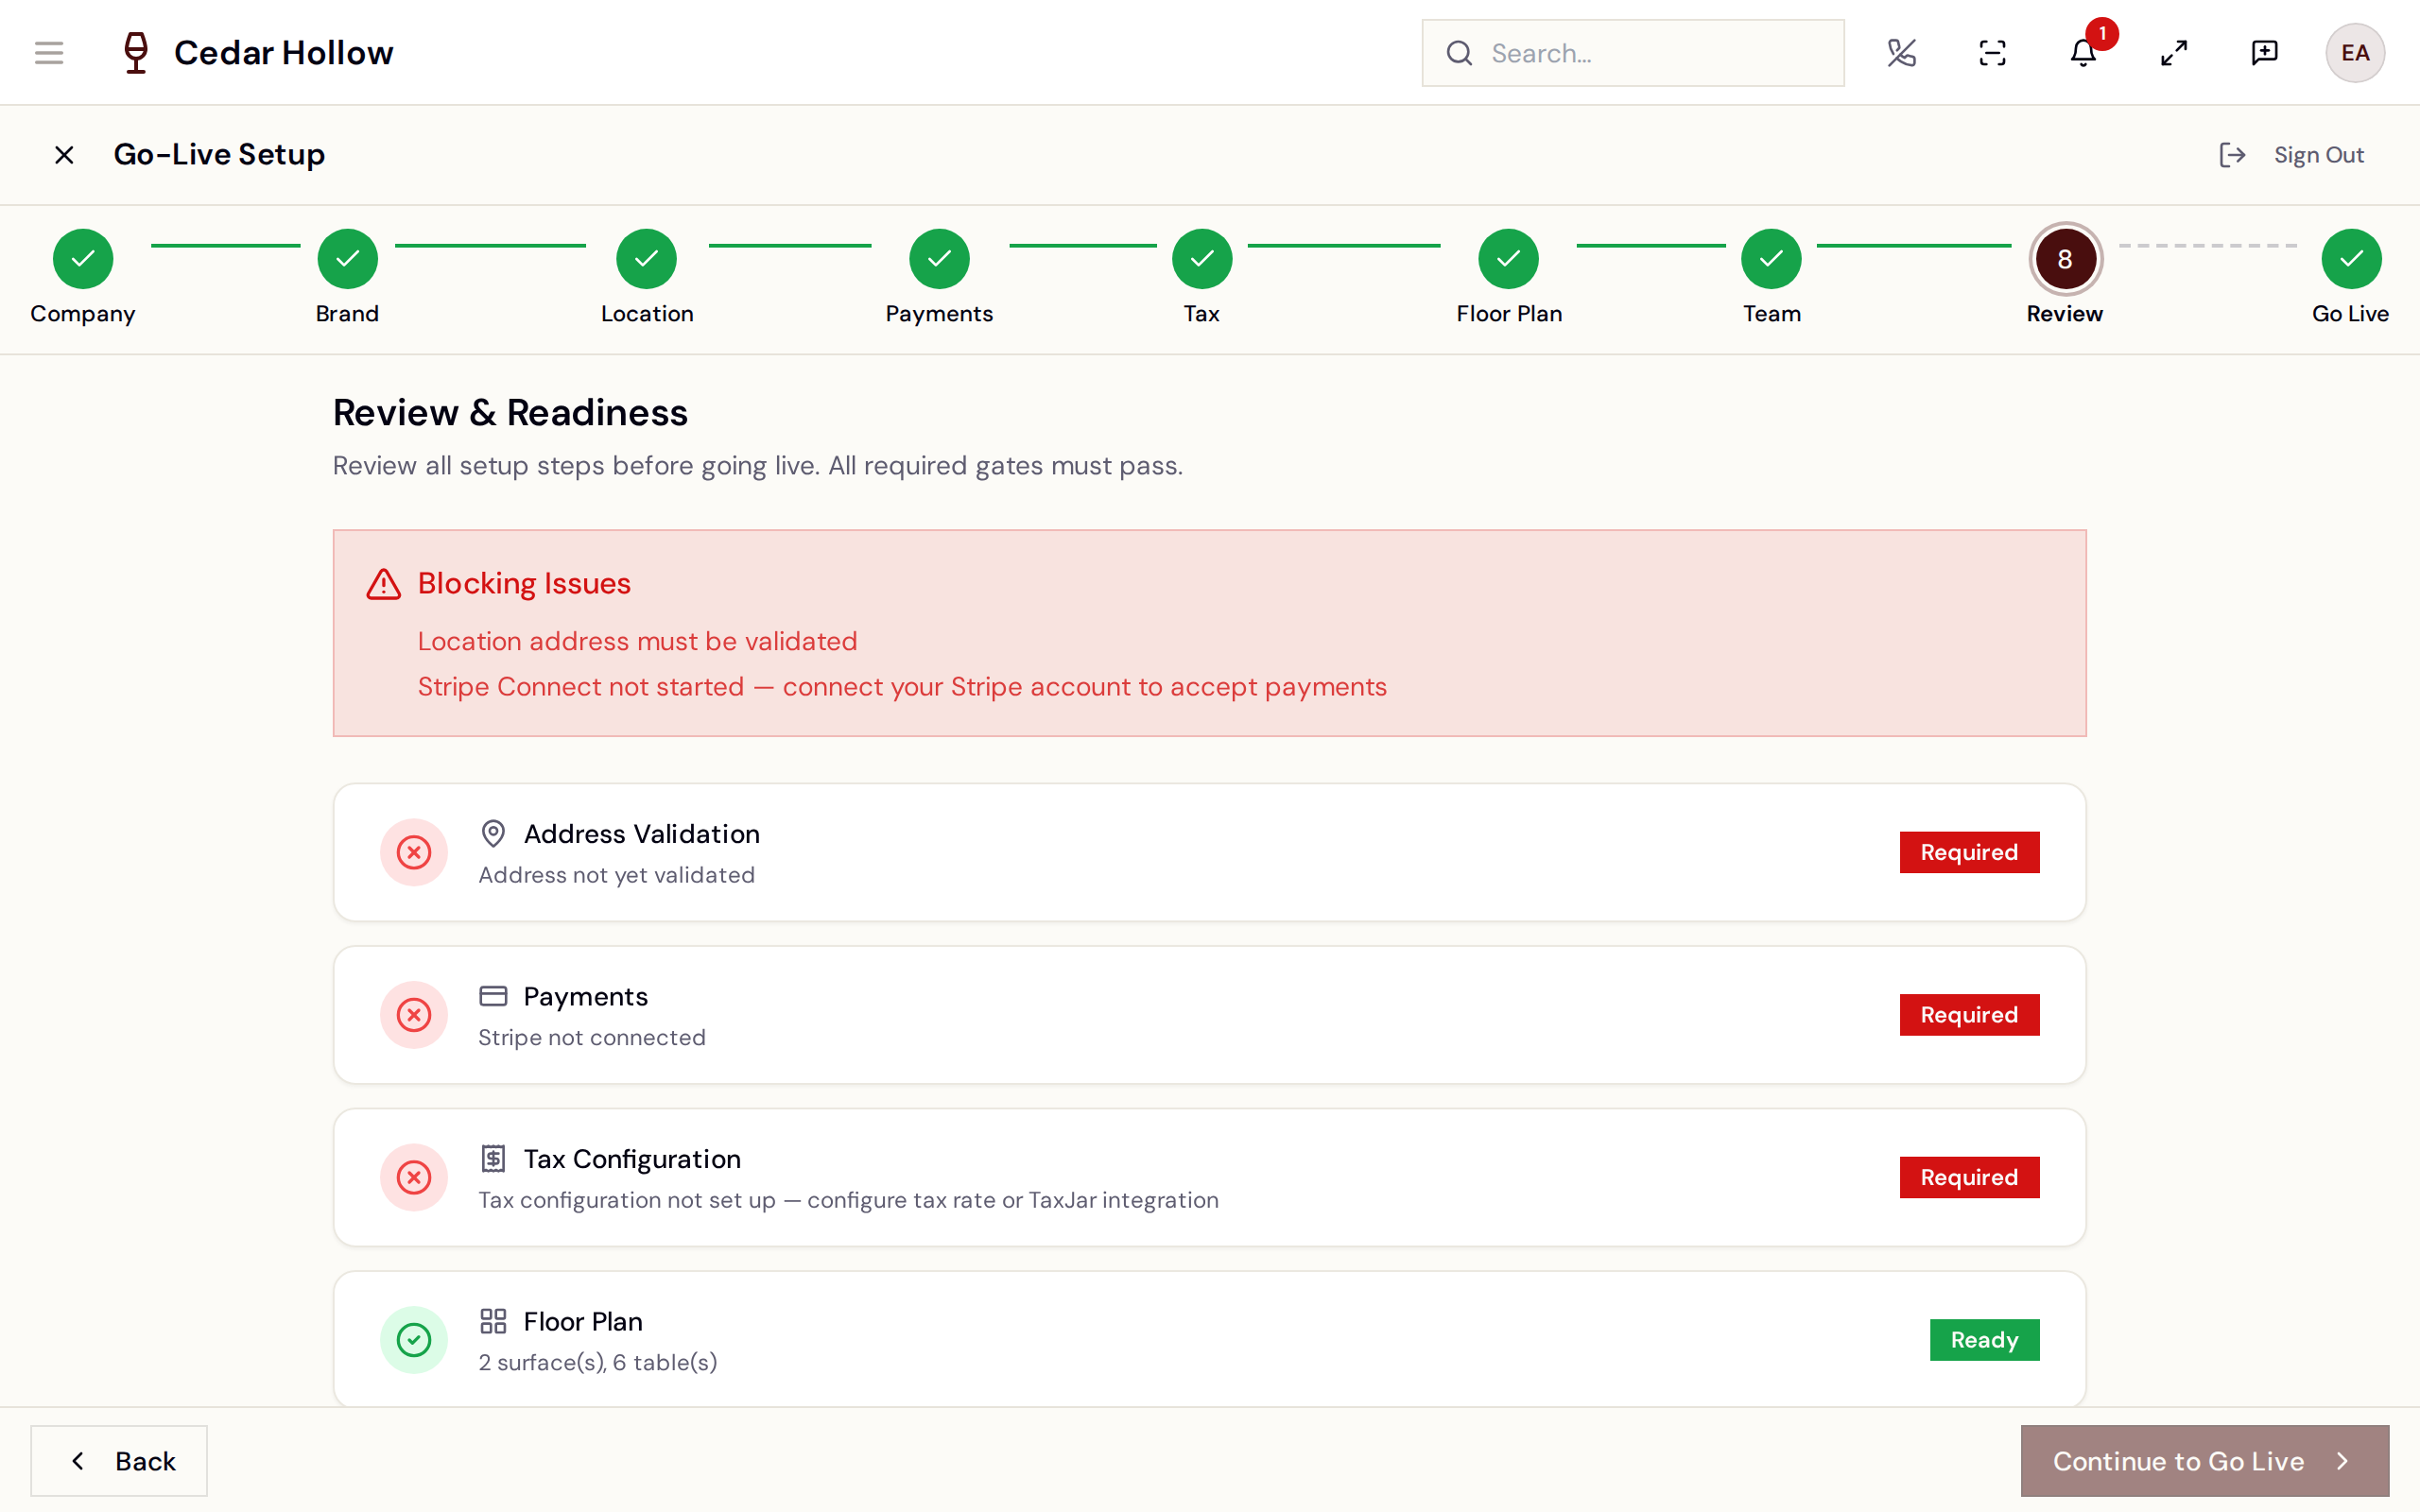
Review — a pass/fail check of everything before you go live.
11. Go Live
The finish line. Go Live is enabled once all required checks pass. Selecting it turns your winery on: payments processing, reservations, guest-facing features, and the POS all go active, and the wizard is marked complete. Avero then drops you on your dashboard.
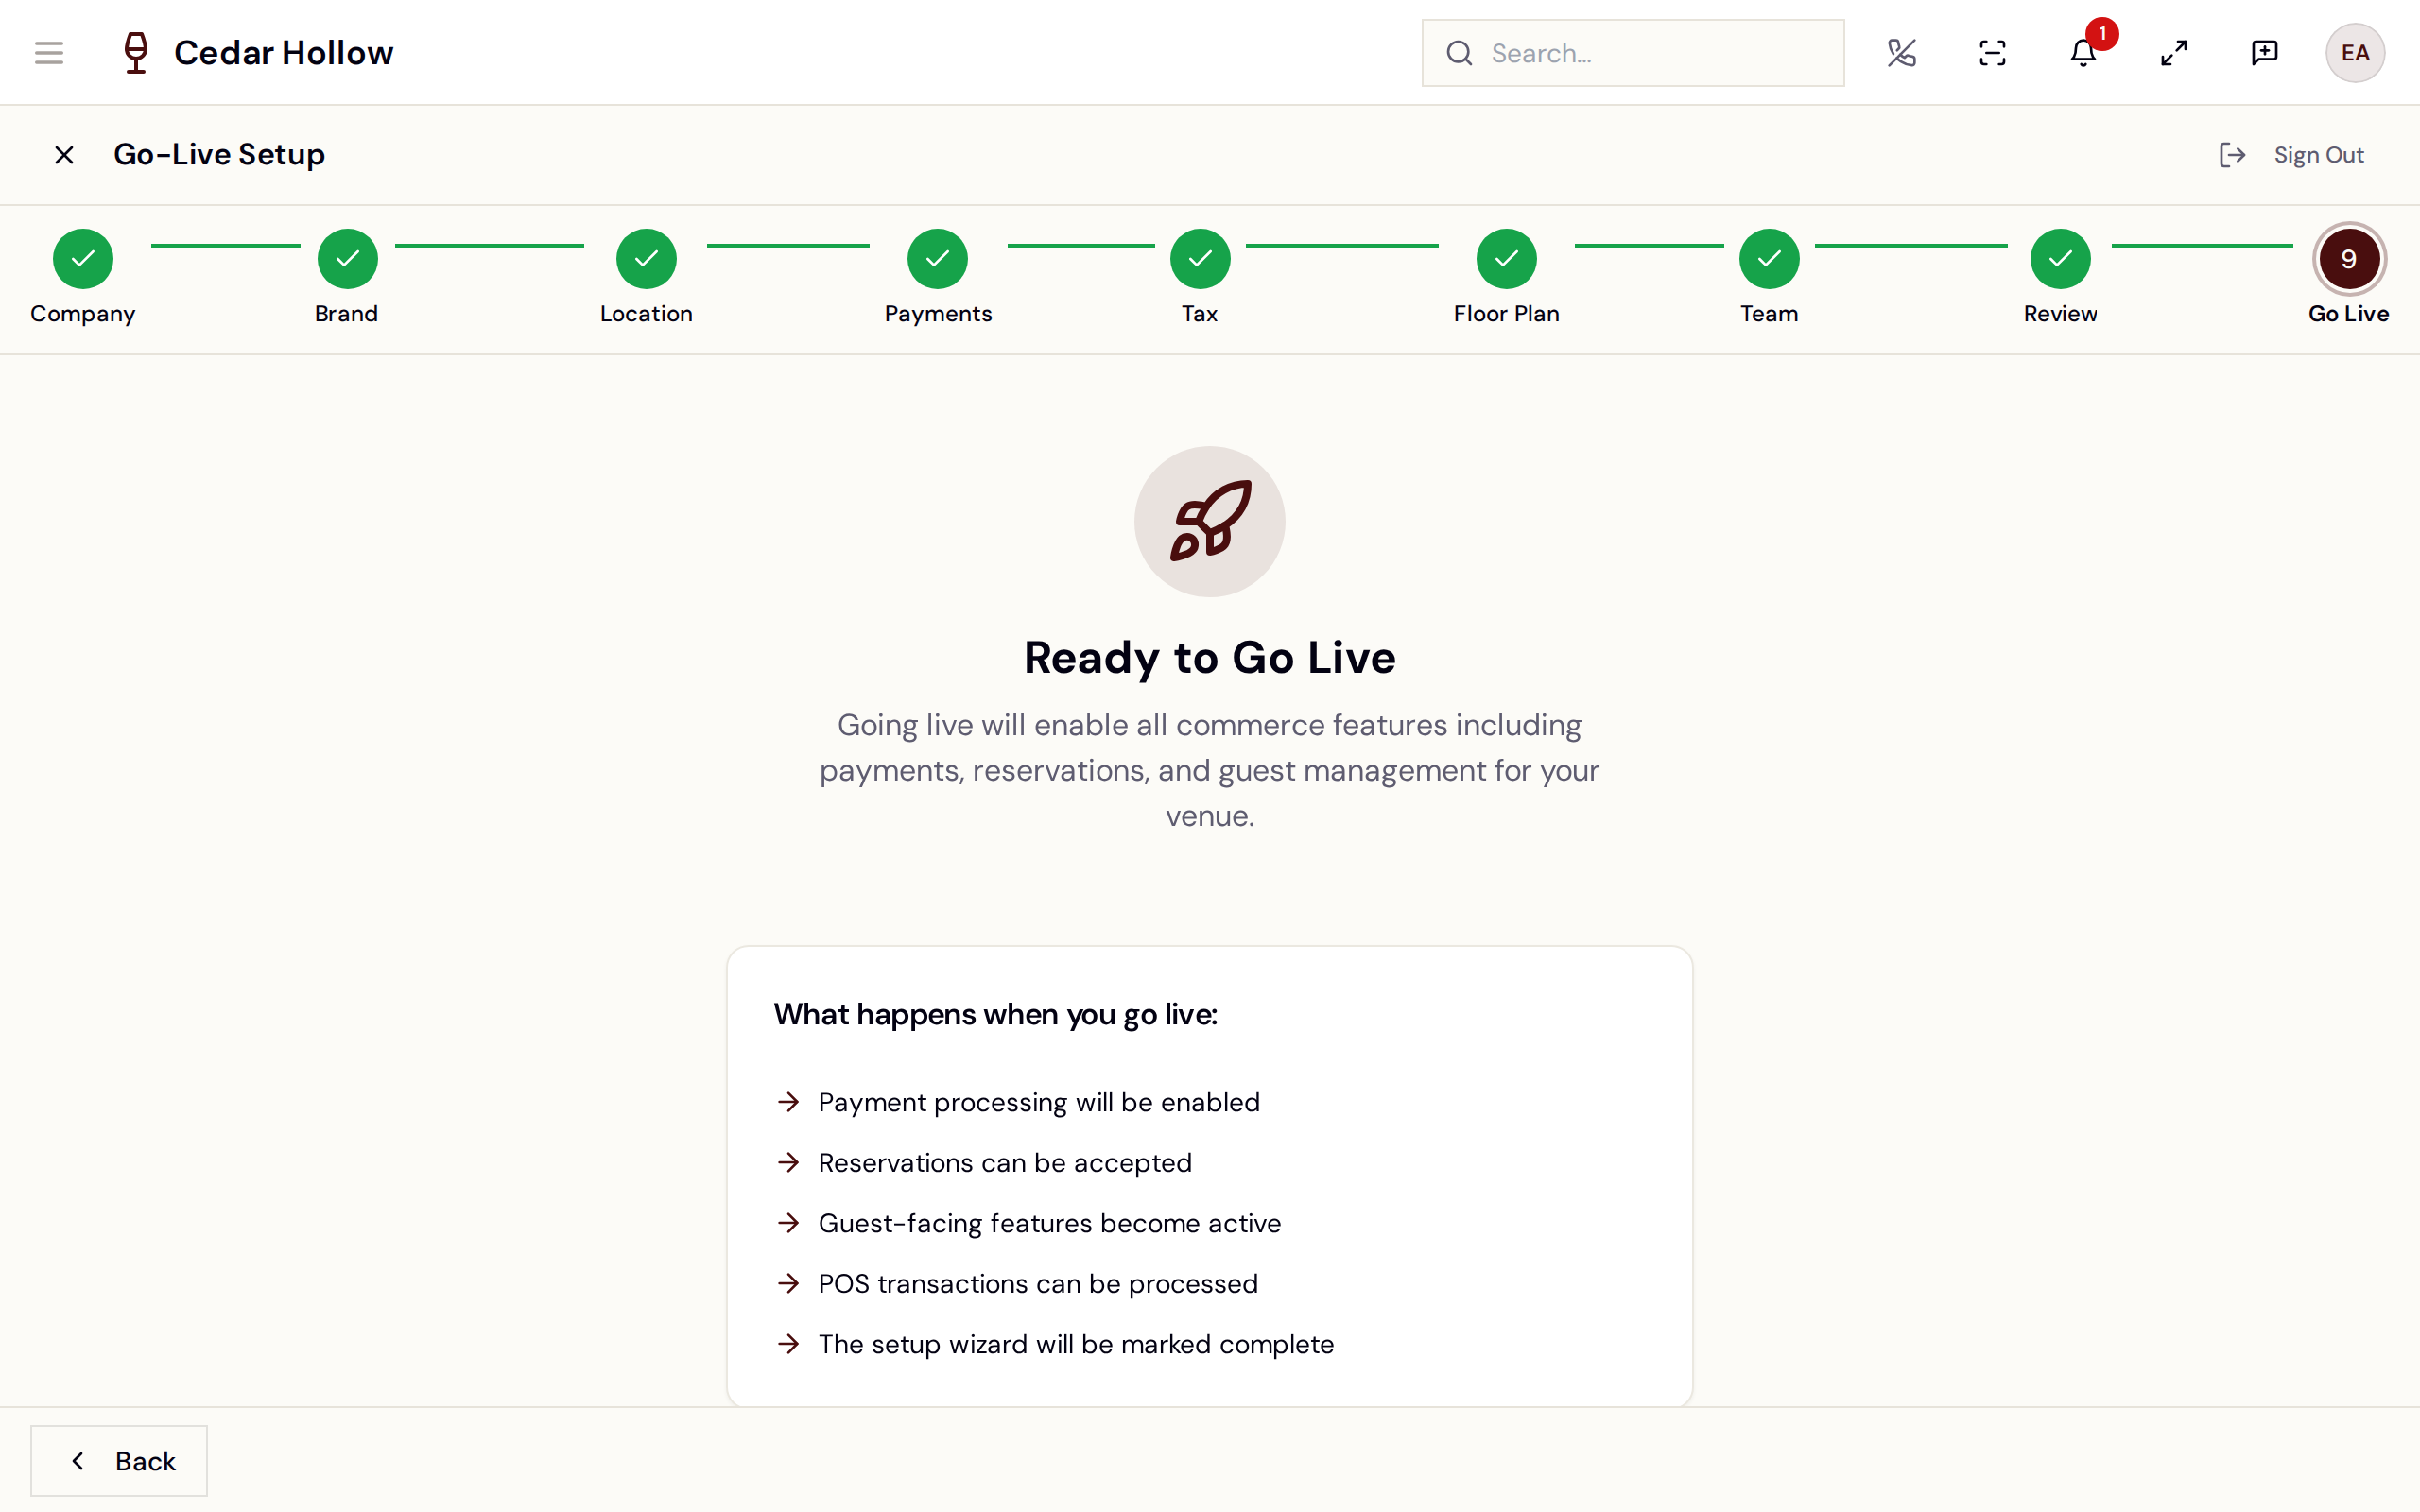
Go Live — flip your winery live on Avero.
Going live doesn't lock anything in — every setting has a home in the app afterward. A read-only summary of your setup, with quick links to each area, stays available.
What's next
- Invite your team — refine roles and add the rest of the staff.
- Reservations & availability — open your book (bookings are closed by default until you generate capacity).
- Floor & seating — work the room from the live floor map.
- Get the Companion app — run the floor from a phone or tablet.